I was in the middle of a late‑night Netflix binge when a sudden craving for a classic Philly cheesesteak hit me like a freight train. I raided the fridge, found a lonely slab of top‑sirloin, a bag of basmati rice, and a stack of reduced‑fat cheese slices. The kitchen smelled like a diner after a rush hour, the onions were glistening, and the sizzle from the pan was louder than the TV dialogue. I thought, “What if I could capture that indulgent cheesesteak vibe, but make it a bowl that actually feeds my body and not just my cravings?”
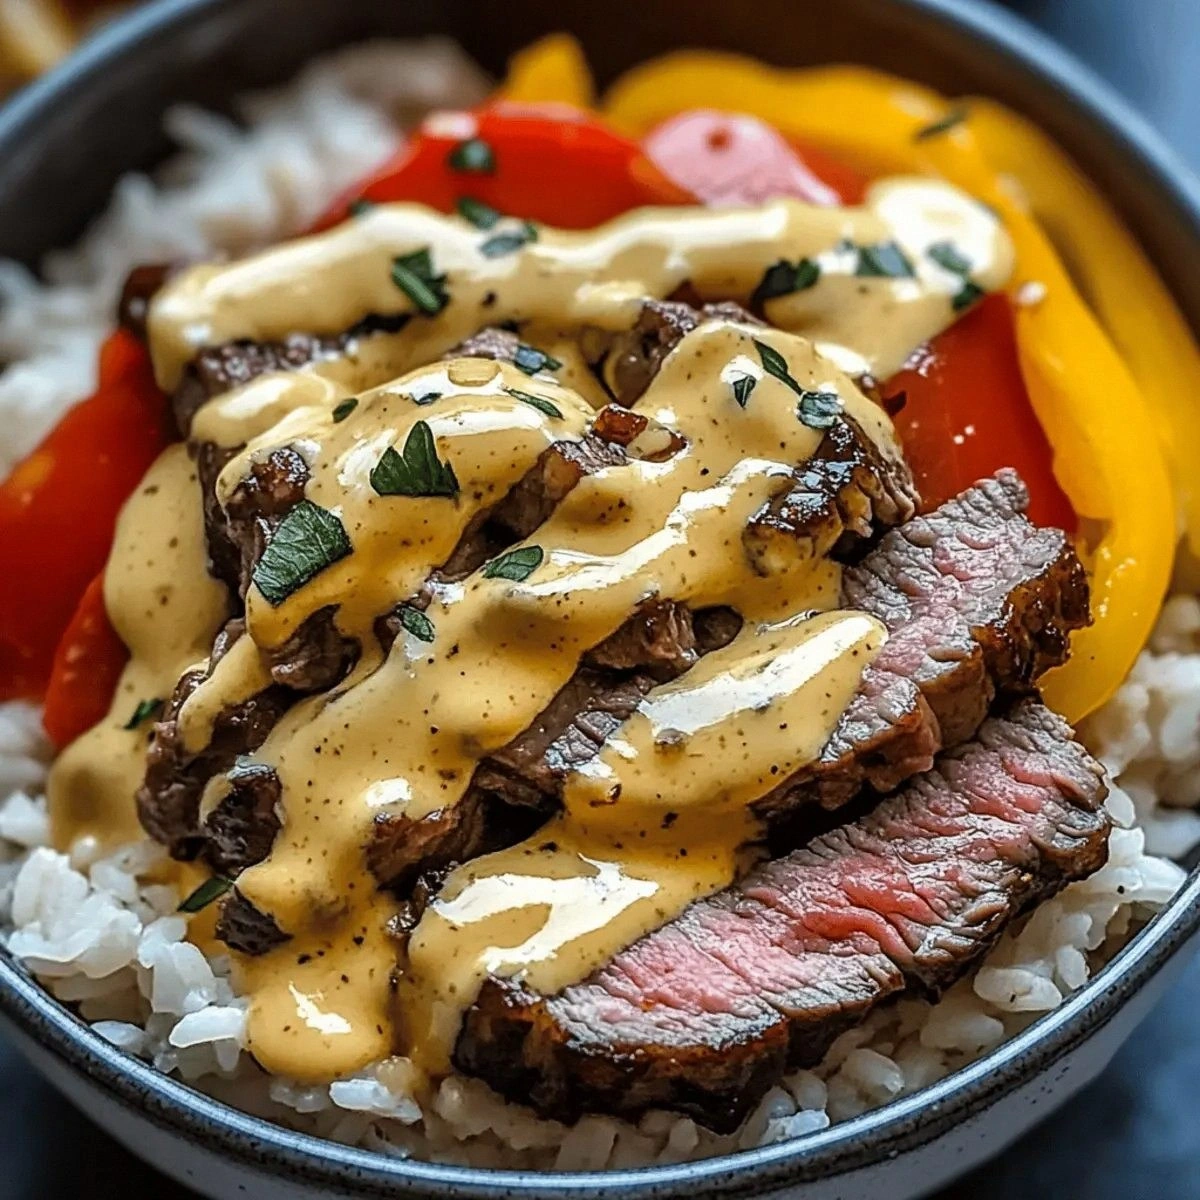
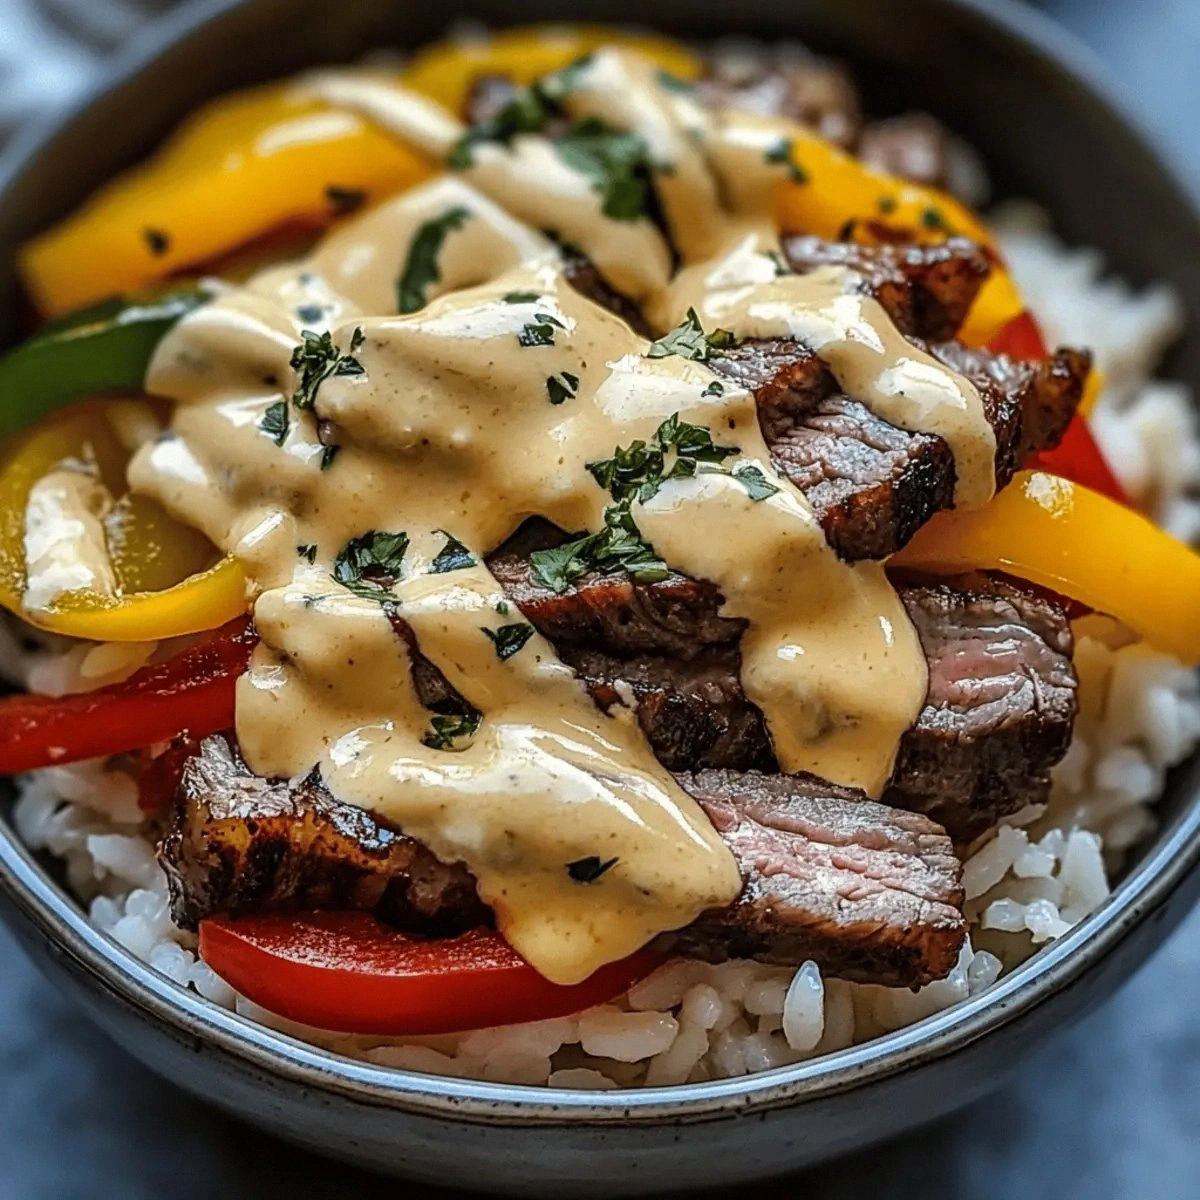
Fast forward a few frantic minutes of chopping, searing, and stirring, and I ended up with a bowl that looks like a work of art and tastes like a hug from your favorite comfort‑food aunt. The rice is fluffy, the beef is juicy and seasoned to perfection, and the cheese sauce clings to every grain like a velvety blanket. I dare you to taste this and not go back for seconds. This is hands down the best version you’ll ever make at home, and I’m about to spill every secret that makes it so unforgettable.
Most recipes get this completely wrong – they either drown the steak in sauce or leave the rice soggy and bland. Here’s what actually works: a precise balance of Worcestershire‑kissed beef, a low‑fat cheese sauce that’s still decadently creamy, and a rice base that stays separate, not mushy. I’ll be honest — I ate half the batch before anyone else got to try it, and that’s a testament to how addictive this bowl is. If you’ve ever struggled with a soggy, flavor‑less rice bowl, you’re not alone — and I’ve got the fix.
Picture yourself pulling this out of the pot, the whole kitchen smelling incredible, steam swirling like a cozy blanket, and the first bite delivering a perfect harmony of savory, tangy, and just‑right‑spicy notes. Okay, ready for the game‑changer? Let me walk you through every single step — by the end, you’ll wonder how you ever made it any other way.
What Makes This Version Stand Out
- Taste: The combination of Worcestershire‑infused beef and a low‑fat cheese sauce delivers that classic cheesesteak flavor without the guilt.
- Texture: Fluffy, separate basmati grains contrast with the caramelized edge of the beef, creating a satisfying bite‑after‑bite.
- Simplicity: Fewer than ten steps and pantry‑friendly ingredients mean you can pull this together on a weeknight.
- Uniqueness: Swapping the traditional hoagie roll for rice makes it gluten‑free, lower‑calorie, and surprisingly portable.
- Crowd Reaction: Friends have called it “comfort food on steroids” and begged for the recipe before the first spoonful was even finished.
- Ingredient Quality: Using top‑sirloin ensures a tender, beefy bite that cheap cuts just can’t match.
- Cooking Method: High‑heat searing locks in juices, while a gentle simmer for the rice keeps it from turning gummy.
- Make‑Ahead Potential: The components can be pre‑cooked and assembled in minutes, perfect for meal‑prep warriors.
Inside the Ingredient List
The Flavor Base
The backbone of any great cheesesteak bowl is the beef and its seasoning. 2000 g Raw Top Sirloin Beef gives you that buttery tenderness you crave; if you settle for flank or chuck, expect a chewier texture. 3 tsp Salt and 3 tsp Black Pepper are the classic duo that awakens the meat’s natural flavors, while 4 tsp Garlic Powder and 4 tsp Onion Powder add depth without the moisture of fresh aromatics. 140 g Worcestershire Sauce is the secret‑weapon that brings that unmistakable tangy, umami punch reminiscent of a true Philly sub.
The Texture Crew
520 g Uncooked Basmati Rice is the star of the carbohydrate side. Its long grains stay separate when cooked properly, giving you that fluffy, non‑sticky foundation. 6 tsp Olive Oil coats the rice lightly, preventing clumping and adding a subtle fruitiness. 400 g White Onion, 200 g Green Bell Pepper, and 200 g Red Bell Pepper provide crunch and a sweet‑peppery contrast to the savory beef. Finally, 50 g Minced Garlic is added at the end of the sauté to give a fresh, aromatic lift.
The Unexpected Star
16 Reduced Fat Cheese Slices might sound modest, but when melted with 500 g 1% Milk and 200 g Low‑Fat Cheddar, they create a sauce that’s creamy without the heaviness of full‑fat cheese. The sauce clings to the rice like velvet, delivering that indulgent mouthfeel. 1 tsp Chili Flakes inject a whisper of heat that keeps the palate awake, while 2 tbsp Fresh Parsley adds a bright, herbaceous finish.
The Final Flourish
120 g Grated Parmesan is sprinkled on top just before serving, providing a salty, nutty finish that elevates the entire bowl. If you’re feeling adventurous, a dash of extra Parmesan can turn the dish from comfort food to gourmet.
Everything's prepped? Good. Let’s get into the real action…
The Method — Step by Step
Start by rinsing the basmati rice under cold water until the water runs clear. This removes excess starch and prevents the grains from sticking together. In a medium saucepan, combine the rinsed rice, 1 L water, a pinch of salt, and 2 tsp olive oil. Bring to a boil, then reduce to a gentle simmer, cover, and cook for 12‑15 minutes. When the water is fully absorbed, remove from heat and let it sit, covered, for another 5 minutes. Fluff with a fork – the grains should be light, separate, and slightly aromatic. That sizzle when it hits the pan? Absolute perfection.
While the rice cooks, slice the top sirloin into thin, bite‑size strips. In a large bowl, toss the beef with 3 tsp salt, 3 tsp black pepper, 4 tsp garlic powder, 4 tsp onion powder, and the Worcestershire sauce. Let it marinate for at least 5 minutes – this is the moment where flavor really penetrates the meat.
Heat a heavy‑bottomed skillet over high heat. Add 2 tsp olive oil and wait until it shimmers. Drop the marinated beef in a single layer; you should hear an immediate, satisfying sizzle. Let the meat sear without moving for 2 minutes, then stir and continue cooking until the beef is browned but still juicy, about 4‑5 minutes total. Watch Out: Overcrowding the pan will steam the meat instead of searing it, resulting in a loss of that coveted caramelized edge.
Remove the beef and set aside. In the same skillet, add the remaining 2 tsp olive oil, then toss in the diced white onion, green bell pepper, and red bell pepper. Sauté over medium‑high heat until the vegetables soften and the edges start to caramelize, about 6‑7 minutes. Add the minced garlic and cook for another 30 seconds – you’ll hear a fragrant pop that tells you it’s ready.
Now for the cheese sauce: In a saucepan, whisk together the 500 g 1% milk and 200 g low‑fat cheddar over medium heat. Stir constantly until the cheese melts and the mixture thickens slightly, about 5 minutes. Reduce the heat to low and fold in the reduced‑fat cheese slices, letting them melt into a smooth, velvety sauce. Sprinkle in the chili flakes for a subtle heat, then season with a pinch of additional salt if needed.
Return the seared beef and sautéed vegetables to the skillet, pour the cheese sauce over everything, and toss gently to coat. Let the mixture simmer for 2‑3 minutes so the flavors meld. At this point, you can taste and adjust seasoning – a splash more Worcestershire or a dash of pepper can make a big difference.
To assemble the bowls, scoop a generous mound of fluffy basmati rice into each serving bowl. Spoon the beef‑and‑veggie mixture over the rice, ensuring every bite gets a bit of everything. Sprinkle grated Parmesan and fresh parsley on top for a finishing touch that adds brightness and a salty crunch.
Serve immediately while the cheese sauce is still glossy. This is the moment of truth – the steam rising, the aroma of caramelized onions, and the rich, cheesy goodness should make your kitchen feel like a five‑star diner. I dare you to taste this and not go back for seconds. And now the fun part: store leftovers in airtight containers, and they’ll taste just as amazing the next day.
Insider Tricks for Flawless Results
The Temperature Rule Nobody Follows
Never cook the beef over low heat. High heat creates a Maillard reaction, giving you those caramelized edges that taste like sweet, smoky nuggets. If you’re using a non‑stick pan, pre‑heat it for at least a minute before adding oil; the pan should be hot enough that a drop of water sizzles and evaporates instantly.
Why Your Nose Knows Best
Your sense of smell is the ultimate doneness gauge. When the onions start to turn golden and give off a sweet perfume, you know they’re ready. Similarly, when the cheese sauce begins to emit a buttery, slightly nutty aroma, it’s time to lower the heat and combine everything.
The 5‑Minute Rest That Changes Everything
After searing the beef, let it rest for five minutes before mixing it with the sauce. This short pause lets the juices redistribute, preventing a dry bite. I once skipped this step and ended up with a bowl that tasted like a steak sandwich that had been left out too long – not ideal.
Parmesan Power Boost
Adding the grated Parmesan at the very end, right before serving, gives a burst of umami that lifts the entire dish. It also creates a subtle crust on the top of the sauce as it cools, adding texture.
The One‑Minute Steam Trick
If the rice looks a bit dry after reheating, sprinkle a teaspoon of water over it, cover the bowl with a lid, and let it steam for one minute. The steam re‑hydrates the grains, making them fluffy again.
Creative Twists and Variations
This recipe is a playground. Here are some of my favorite ways to switch things up:
Spicy Sriracha Swirl
Stir in a tablespoon of sriracha into the cheese sauce for a bold, Asian‑inspired heat. Top with sliced scallions and toasted sesame seeds for crunch.
Mediterranean Magic
Replace the bell peppers with chopped sun‑dried tomatoes and olives, and sprinkle feta cheese instead of Parmesan. A drizzle of lemon‑infused olive oil adds brightness.
Vegan Victory
Swap the beef for marinated tempeh, use plant‑based cheese slices, and substitute the milk with oat or almond milk. The result is a compassionate yet indulgent bowl.
Breakfast Boost
Add a poached egg on top, let the yolk run into the sauce, and sprinkle a pinch of smoked paprika. It turns the dish into a hearty brunch that can power you through the day.
Tex‑Mex Twist
Incorporate black beans and corn, swap the parsley for cilantro, and finish with a squeeze of lime. The chili flakes become a subtle background to the fresh lime zing.
Storing and Bringing It Back to Life
Fridge Storage
Place the rice and the beef‑veggie‑sauce mixture in separate airtight containers. The rice stays fluffy for up to 4 days, while the sauce retains its creaminess for 3 days. When ready to eat, reheat the sauce gently on the stove and the rice in the microwave.
Freezer Friendly
Cool the cooked rice completely, then portion into freezer bags (about 1 cup per bag). The beef‑and‑veggie mixture can also be frozen in a zip‑top bag. Both freeze well for up to 2 months. Defrost overnight in the fridge, then follow the reheating tips.
Best Reheating Method
For the ultimate texture, reheat the rice in a skillet with a splash of water, covering the pan for 2‑3 minutes. Warm the sauce in a saucepan over low heat, stirring constantly. Combine, top with fresh parsley, and you’ll think you just cooked it fresh.