I’m going to start with a confession: I once burned a batch of chocolate cookies so badly that they turned into a single, charred disc that could have been used as a coaster for a hot mug of cocoa. I was devastated, but the disaster sparked a fierce determination to crack the code on the perfect chocolate thumbprint cookie. After countless trials, a few kitchen mishaps, and a lot of taste‑testing (I dare you to taste this and not go back for seconds), I finally landed on a version that makes my friends swear it’s the best they’ve ever had. This is hands down the best version you’ll ever make at home, and I’m about to spill every secret.
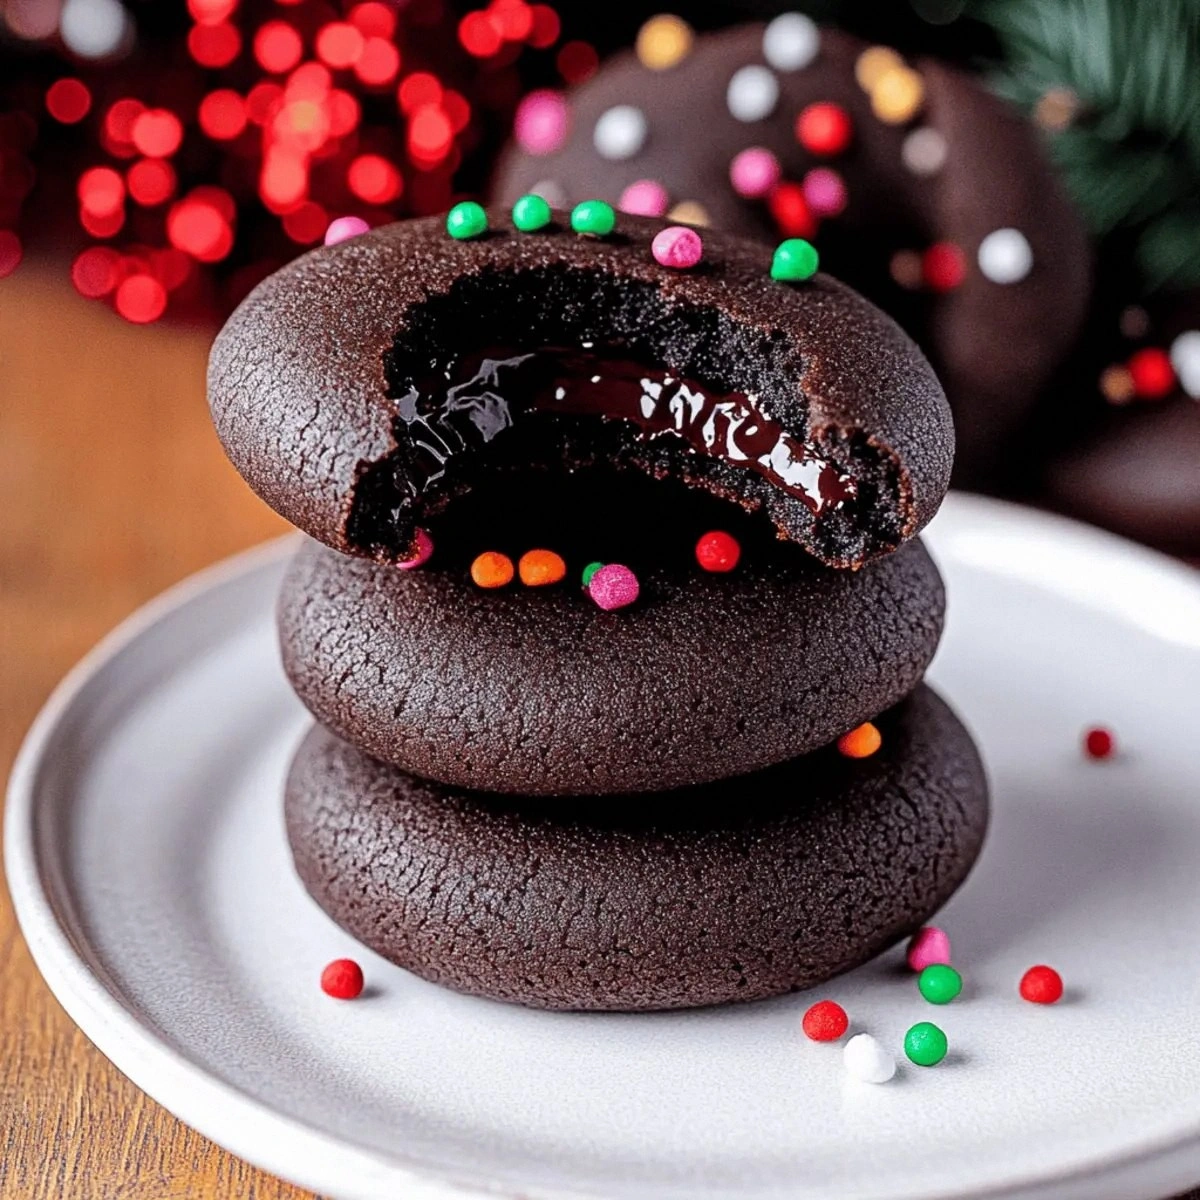
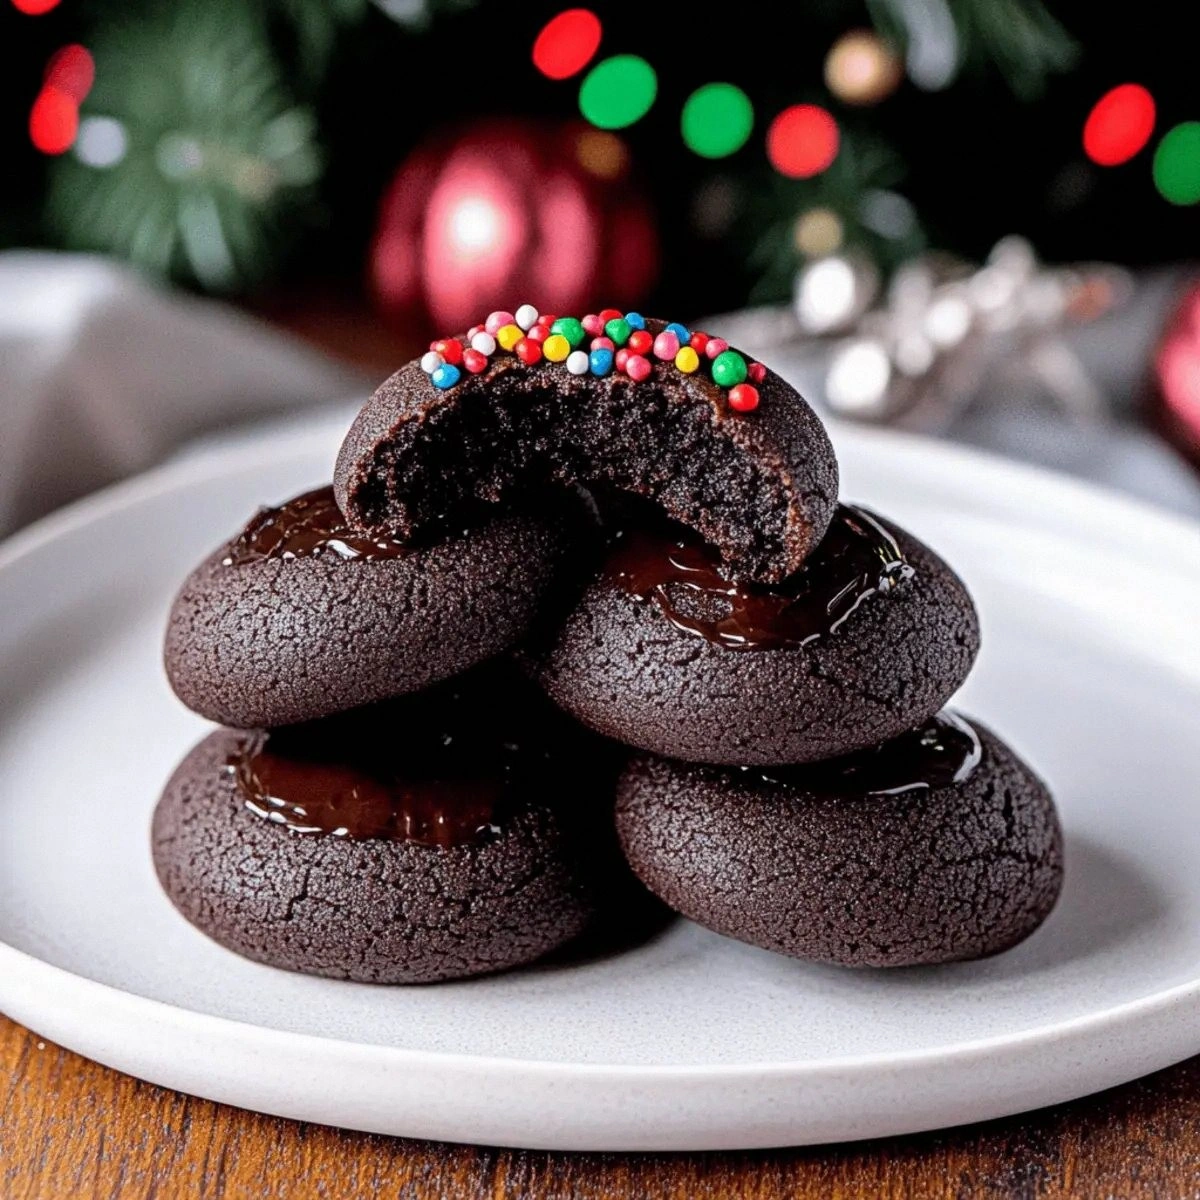
Picture this: the moment you pull the tray from the oven, the whole kitchen is saturated with a deep, earthy chocolate aroma that feels like a warm hug from an old friend. The cookies themselves have a crisp edge that shatters like thin ice, while the center stays soft, almost melt‑in‑your‑mouth, ready to receive a luscious ganache that coats the thumbprint like velvet. You can hear the faint crackle of the cookie as you bite into it, and the taste is an orchestra of bittersweet chocolate, buttery richness, and a whisper of vanilla that lingers on the palate. It’s a sensory snapshot that makes you pause, smile, and think, “Why haven’t I discovered this sooner?”
Most recipes get this completely wrong. They either over‑sweeten the dough, under‑bake the cookies, or use a ganache that’s too runny and ends up pooling on the plate. Here’s what actually works: a balanced blend of Dutch‑process cocoa for depth, a touch of baking powder for a subtle lift, and a ganache that’s thick enough to stay put but still silky. The secret ingredient? A splash of heavy whipping cream that brings the ganache to that perfect glossy sheen without being greasy. And let’s not forget the optional nonpareils that add a playful pop of color and a tiny crunch that surprises you on the first bite.
Okay, ready for the game‑changer? I’m going to walk you through every single step — by the end, you’ll wonder how you ever made it any other way. Stay with me here — this is worth it. Picture yourself pulling these cookies out of the oven, the whole kitchen smelling incredible, and then diving into a bite that feels like a celebration in your mouth. Let’s get started.
What Makes This Version Stand Out
- Deep Flavor: Using Dutch‑process cocoa gives the dough an intense chocolate backbone that’s richer than regular cocoa, and the semi‑sweet chips add pockets of melty goodness.
- Perfect Texture: A buttery crumb with a crisp edge and a soft, chewy center creates a contrast that’s addictive and satisfies every texture craving.
- Simple Technique: No fancy equipment, just a mixing bowl, a spoon, and a steady hand for the thumbprints – perfect for even the most novice bakers.
- Unique Ganache: The ganache is thick enough to stay in the thumbprint without spilling, yet it melts luxuriously on the tongue, delivering a velvety finish.
- Crowd‑Pleaser: These cookies have a reputation for disappearing within minutes at parties; they’re the kind of treat that gets people lining up for a second round.
- Ingredient Quality: High‑quality butter and cocoa make a world of difference; you’ll taste the difference in every bite.
- Cooking Method: Baking at a precise 350°F ensures the edges set while the center stays tender, a balance that many recipes miss.
- Make‑Ahead Potential: The cookies can be baked ahead of time and stored; the ganache can be reheated, making them perfect for last‑minute dessert plans.
Inside the Ingredient List
The Flavor Base
All‑purpose flour is the canvas, providing structure without overwhelming the chocolate flavor. Using the full 2 cups ensures the cookies hold together after the butter melts. If you substitute cake flour, the cookies will be too delicate and may crumble. For the ultimate flavor depth, I choose a high‑quality Dutch‑process cocoa powder; its alkalized nature brings out a smoother, less acidic chocolate taste. Skipping the cocoa or using a cheap brand will leave the cookies tasting flat and dull.
The Texture Crew
Unsalted butter, softened but not melted, creates that melt‑in‑your‑mouth crumb. I always recommend European‑style butter for its higher butterfat content, which translates to richer flavor. Light brown sugar adds a subtle caramel note and moisture, while granulated sugar contributes crispness. The combination of the two sugars is what gives the cookie its signature snap on the edges. Egg yolks provide richness and help bind the dough; using whole eggs would make the cookies too cakey.
The Unexpected Star
Heavy whipping cream is the secret hero of the ganache. Its high fat content creates a glossy, silky coating that doesn’t separate. If you substitute milk, the ganache will be thin and may weep. The semi‑sweet chocolate chips melt into pockets of molten chocolate that surprise the eater. Finally, a pinch of vanilla bean paste adds a fragrant undertone that elevates the overall profile.
The Final Flourish
A quarter teaspoon of salt might seem trivial, but it amplifies the chocolate’s depth and balances the sweetness. Baking powder is used sparingly (just one teaspoon) to give a subtle lift without making the cookies puffy. The optional nonpareils add a festive pop of color and a tiny crunch that delights the senses. If you’re allergic to nuts, these are a safe decorative alternative to chopped hazelnuts or almonds.
Everything's prepped? Good. Let's get into the real action…
The Method — Step by Step
Preheat your oven to 350°F (175°C) and line two baking sheets with parchment paper. While the oven warms, take a moment to appreciate the quiet hum of the kitchen — that’s the sound of anticipation building.
In a large mixing bowl, whisk together the flour, Dutch‑process cocoa powder, baking powder, and salt. The dry mixture should look like a deep, velvety brown dust; this is your flavor foundation, and it should smell faintly chocolatey.
In a separate bowl, beat the softened butter with the light brown sugar and granulated sugar until the mixture is light and fluffy, about 2–3 minutes on medium speed. The color should turn a creamy caramel hue, and you’ll hear a soft whooshing sound as the air is incorporated.
Add the egg yolks one at a time, beating well after each addition, then stir in the vanilla bean paste. The dough will become glossy and slightly thickened; this is the point where the butter and sugars truly meld.
Gradually fold the dry ingredients into the wet mixture using a spatula. Scrape the sides of the bowl to ensure everything is incorporated; you’ll notice the dough becoming a uniform, thick chocolate mass.
Stir in the semi‑sweet chocolate chips until evenly distributed. The chips should stay whole, not melt into the dough. This step is crucial for those delightful pockets of molten chocolate later on.
Using a cookie scoop (about 1½ tablespoons), portion the dough onto the prepared sheets, spacing them 2 inches apart. Press the center of each cookie gently with your thumb or the back of a small spoon to create a shallow well — this is where the ganache will nestle.
Place the trays in the preheated oven and bake for 10–12 minutes, or until the edges are set and just beginning to turn a golden brown. The tops should look matte, not shiny; a subtle crackle at the edges signals they’re ready.
While the cookies cool on the sheet for about 5 minutes, prepare the ganache. In a small saucepan, combine the heavy whipping cream and semi‑sweet chocolate chips (reserve a handful for garnish). Heat over low‑medium heat, stirring constantly, until the chocolate is fully melted and the mixture is glossy.
Remove the ganache from heat and let it sit for a minute to thicken slightly. Then, using a small spoon or a piping bag, fill each thumbprint generously. The ganache should sit like a glossy pool, but not spill over the edges.
Allow the cookies to cool completely on a wire rack. As they set, the ganache will firm up just enough to hold its shape while remaining melt‑in‑your‑mouth soft.
If you’re using nonpareils, sprinkle them over the ganache while it’s still slightly soft; they’ll adhere beautifully and add a festive sparkle.
That's it — you did it. But hold on, I've got a few more tricks that'll take this to another level…
Insider Tricks for Flawless Results
The Temperature Rule Nobody Follows
Never underestimate the power of a perfectly calibrated oven. I always preheat my oven for at least 15 minutes and then use an oven thermometer to verify the actual temperature. A few degrees off can mean the difference between a chewy center and a dry cookie. My friend once baked at 375°F thinking “a little hotter for a quicker bake” and ended up with burnt edges and a gummy middle. Trust the thermometer, and you’ll get consistent results every time.
Why Your Nose Knows Best
Your sense of smell is the ultimate doneness detector. Around the 9‑minute mark, you’ll start to notice a nutty, toasted aroma wafting from the tray. That scent means the edges are caramelizing just right. If you can’t smell anything, the cookies need a minute or two more. This sensory cue is more reliable than a timer alone.
The 5‑Minute Rest That Changes Everything
After baking, let the cookies rest on the sheet for exactly five minutes before moving them. This short pause allows the interior to finish setting while the bottom continues to firm up. Skipping this step leads to cookies that break apart when you try to lift them, ruining the beautiful thumbprint.
Ganache Consistency Cheat
If your ganache is too runny, return it to low heat for 10 seconds while stirring vigorously. Conversely, if it’s too thick, whisk in a teaspoon of warm cream. This quick adjustment saves you from a soggy disaster and ensures the ganache stays perfectly in the well.
The Chill‑Before‑Bake Secret
Chilling the dough for at least 30 minutes (or even overnight) not only prevents spreading but also intensifies the chocolate flavor as the fats solidify. The dough becomes easier to handle, and the cookies retain their shape, giving you those crisp edges that shatter like thin ice.
Creative Twists and Variations
This recipe is a playground. Here are some of my favorite ways to switch things up:
Mint‑Infused Ganache
Add a teaspoon of peppermint extract to the cream before heating, or steep fresh mint leaves in the cream, then strain. The resulting ganache has a refreshing coolness that pairs beautifully with the rich chocolate cookie.
Espresso Burst
Dissolve a tablespoon of instant espresso powder in the cream for the ganache. The coffee notes deepen the chocolate flavor, creating a sophisticated mocha experience.
White Chocolate Swirl
Swap half of the semi‑sweet chips for white chocolate chips, and drizzle a thin ribbon of melted white chocolate over the ganache after it sets. The contrast of dark and white chocolate is a visual and flavor delight.
Nutty Crunch
Fold in a quarter cup of toasted, finely chopped hazelnuts or almonds into the dough. The nuts add a subtle crunch and a buttery note that elevates the cookie’s texture.
Spiced Holiday Edition
Add a pinch of ground cinnamon, nutmeg, and a dash of cayenne to the dry ingredients. The warm spices give the cookies a festive twist perfect for the holiday season.
Storing and Bringing It Back to Life
Fridge Storage
Place the cooled cookies in an airtight container and store them in the refrigerator for up to a week. The cool environment keeps the ganache firm and the cookie crumb from drying out. If you prefer a softer ganache, let the cookies sit at room temperature for 15 minutes before serving.
Freezer Friendly
These cookies freeze beautifully. Arrange a single layer on a parchment‑lined tray, freeze until solid, then transfer to a zip‑top freezer bag. They’ll keep for up to three months. When you’re ready, thaw at room temperature for 20 minutes, then pop them under a 150°F (65°C) oven for 5 minutes to refresh the texture.
Best Reheating Method
To revive a cookie that’s lost its softness, place it on a microwave‑safe plate, add a tiny splash (about a teaspoon) of water beside it, and microwave on medium for 10‑12 seconds. The steam generated will re‑hydrate the crumb, while the ganache softens back to its creamy perfection.