Picture this: it’s 2 a.m., you’ve just survived a marathon of Netflix, and a sudden, insistent craving for something chocolatey slams into you like a rogue wave. You sprint to the pantry, only to discover you’re out of butter, out of eggs, and the only dairy left is a tub of plain Greek yogurt that’s been chilling there for a week. Most people would throw in the towel and order a cookie, but I’m not most people. I dared myself to turn that humble tub of yogurt into the star of a brownie that would make even the most seasoned pastry chef nod in respectful approval. I was skeptical, I was hungry, and I was ready to prove that a single ingredient could rewrite the rules of brownie‑making.
The kitchen filled with the sweet scent of maple syrup as it hit the hot pan, the air humming with the low, comforting crackle of cocoa dust swirling into the mix. My senses were on high alert: the glossy sheen of melted chocolate chips catching the light, the faint nuttiness of almond flour whispering promises of a tender crumb, and the subtle, almost floral note of vanilla that seemed to hug the batter like an old friend. As the batter settled into the pan, the aroma rose like a warm, chocolate‑laden blanket, wrapping the entire house in a cozy, indulgent hug. I could already hear the faint sighs of my friends as they hovered at the door, eyes wide, mouths watering.
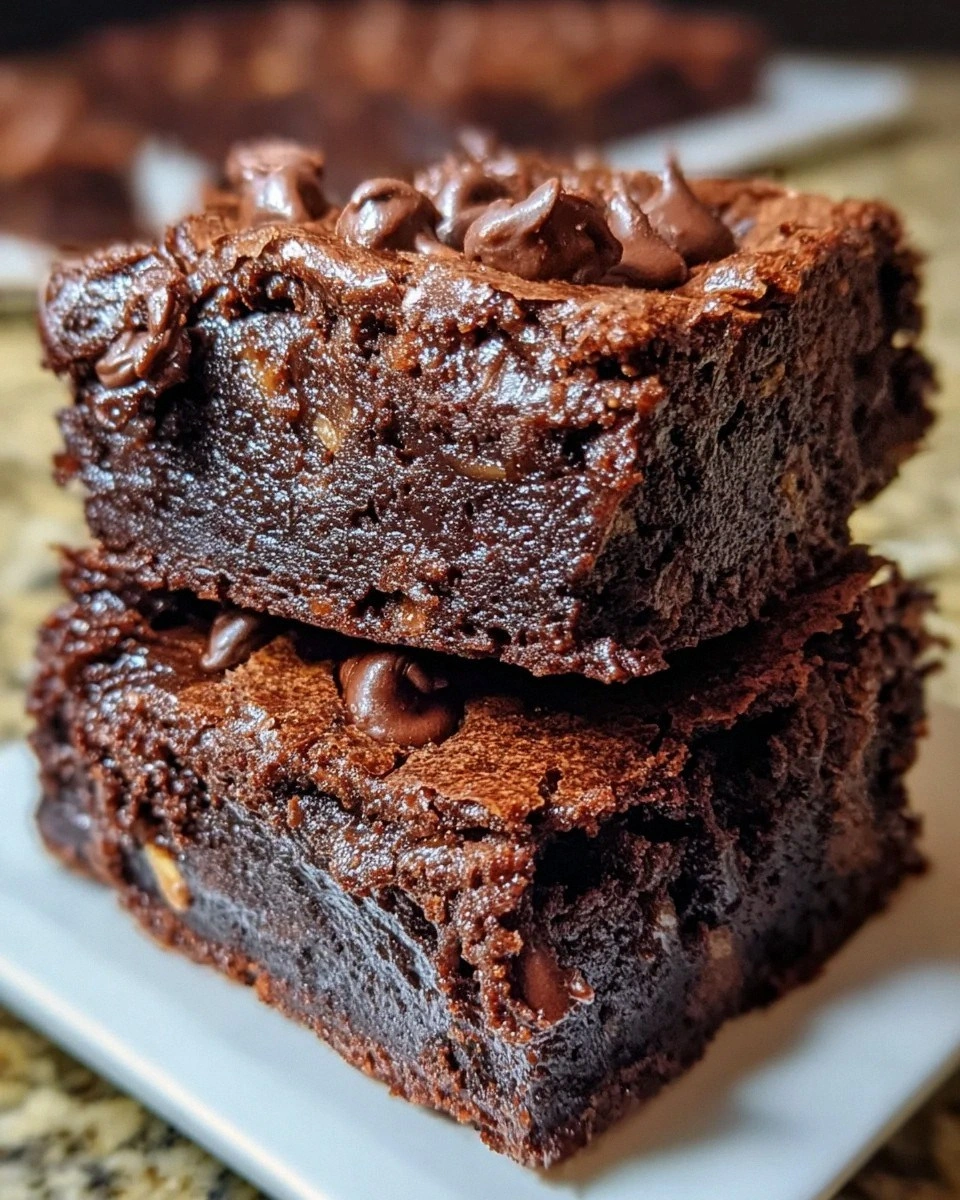
Most brownie recipes out there are a chaotic mess of butter, oil, and sugar that leaves you with a dense, greasy slab that clings to the fork. This version? It’s a revelation. By swapping the traditional fat for Greek yogurt, we get a brownie that’s moist, protein‑packed, and surprisingly light without sacrificing that deep, fudgy chocolate soul. The texture is a perfect balance between cakey and fudgy—think of a cloud that’s been dunked in chocolate. And the best part? It’s gluten‑free, dairy‑light, and uses maple syrup as a natural sweetener, so you can indulge without the usual guilt trip.
But here’s the kicker: the secret weapon isn’t just the yogurt. It’s the combination of almond flour, which adds a buttery richness, and a pinch of sea salt that amplifies every chocolate note. I’m also throwing in optional dark chocolate chips for that extra melty surprise, and a handful of chopped walnuts that give a satisfying crunch. I dare you to taste this and not go back for seconds. Let me walk you through every single step — by the end, you’ll wonder how you ever made brownies any other way.
What Makes This Version Stand Out
- Protein‑Power: The Greek yogurt injects a solid dose of protein, turning a typical dessert into a post‑workout treat that still feels indulgent.
- Moisture Mastery: Yogurt’s natural acidity breaks down the flour, creating a tender crumb that stays soft even after cooling.
- Natural Sweetness: Maple syrup provides a caramel‑like depth that refined sugar simply can’t match, while keeping the glycemic impact lower.
- Gluten‑Free Goodness: Using almond or oat flour eliminates gluten, making these brownies accessible to more people without compromising texture.
- Flavor Amplifier: A pinch of salt and a splash of vanilla elevate the chocolate flavor to new heights, creating a balanced taste profile.
- Crunch Factor: Optional dark chocolate chips and nuts add textural contrast that keeps each bite exciting.
- Easy Clean‑Up: No melted butter to cling to the pan; just a quick line of parchment and you’re done.
- Make‑Ahead Magic: These brownies keep beautifully in the fridge for up to a week, and they freeze like a dream.
Inside the Ingredient List
The Flavor Base
Plain Greek Yogurt: This is the moist maker! It keeps your brownies soft and adds a punch of protein. The tangy undertone balances the sweetness, creating a sophisticated flavor that’s more than just sugar and chocolate. If you skip it, you’ll end up with a dry, crumbly texture that feels like chewing on cardboard. For the best results, choose a full‑fat Greek yogurt; the extra fat contributes to the richness and helps the batter hold together.
Maple Syrup: A natural sweetener that gives a lovely depth of flavor while keeping the guilt at bay. It also adds a subtle caramel note that plain sugar can’t replicate. If you’re allergic to maple, you can substitute with honey, but expect a slightly different flavor profile. Look for 100% pure maple syrup, not the pancake‑house grade, for the purest taste.
The Texture Crew
Almond Flour or Oet Flour: Both options provide a nutty flavor and a gluten‑free alternative. Almond flour offers healthy fats, while oat flour keeps things light. Using almond flour will give a richer, more buttery crumb, whereas oat flour yields a lighter, slightly airy texture. If you’re on a low‑fat diet, go with oat flour; just be sure to blend it fine for an even batter.
Unsweetened Cocoa Powder: This is where the chocolatey goodness comes from! Dutch‑processed is highly recommended for a smoother taste. It gives the brownies their deep, dark color and that unmistakable chocolate punch. Skipping cocoa or using a low‑quality variety will result in a bland, watery batter.
The Unexpected Star
Eggs: They bind everything together, providing lift and structure to your brownies. The proteins in the eggs coagulate during baking, giving the brownies that coveted “set” edge while keeping the center fudgy. If you’re vegan, try a flax‑egg substitute, but expect a slightly different texture.
Vanilla Extract: For an aromatic touch, this enhances the overall sweetness and flavor profile. A high‑quality pure vanilla extract adds depth without any artificial aftertaste. Avoid imitation vanilla; it can leave a harsh, chemical note.
The Final Flourish
Salt: Just a pinch elevates the flavors, balancing the sweetness beautifully. Salt is the unsung hero that makes chocolate sing; without it, the brownies would taste flat. Use sea salt or kosher salt for a cleaner taste.
Dark Chocolate Chips (optional): Adding these little nuggets of joy brings extra melty chocolate goodness—because one can never have too much chocolate! They melt into pockets of gooey bliss, creating surprise bursts in every bite. If you’re watching sugar, use a low‑sugar dark chip.
Chopped Nuts (optional): Walnuts or pecans can add crunch and richness. They also introduce a buttery, earthy note that pairs perfectly with chocolate. Toast them lightly for an extra flavor boost; just watch them don’t burn.
Everything's prepped? Good. Let's get into the real action...
The Method — Step by Step
Preheat your oven to 350°F (175°C). While the oven warms up, line a 9‑inch square baking pan with parchment paper, letting the excess hang over the sides for easy removal later. This step is crucial because a well‑lined pan guarantees clean edges that pull away from the sides, signaling a perfect bake. Feel the heat of the oven as it starts to radiate; that’s the first sign that your kitchen is about to become a chocolate sanctuary.
In a large mixing bowl, whisk together the Greek yogurt, maple syrup, and vanilla extract until the mixture is smooth and glossy. The yogurt should coat the whisk like a silky veil, and the maple syrup will swirl in, creating a caramel‑tinged ribbon. This is the moment where the batter starts to smell like a breakfast‑café dream, and you’ll know you’re on the right track.
Crack the eggs into a separate bowl, beat them lightly, then pour them into the yogurt mixture. Stir just until combined; you’re looking for a uniform, slightly thick batter that glistens. Over‑beating will incorporate too much air, leading to a cakey texture instead of the desired fudgy feel. The batter should have a glossy sheen that hints at the chocolatey richness to come.
In a separate bowl, sift together the almond flour (or oat flour), unsweetened cocoa powder, and salt. Sifting aerates the dry ingredients, preventing lumps and ensuring an even chocolate distribution. When you combine the dry mix with the wet batter, fold gently with a rubber spatula, turning the bowl over a few times until just incorporated. The batter will look thick and slightly glossy—don’t worry, that’s exactly what we want.
If you’re using dark chocolate chips and chopped nuts, fold them in now. The chips will melt into pockets of molten chocolate, while the nuts add a buttery crunch that contrasts beautifully with the fudgy interior. If you prefer a smoother texture, skip the nuts and increase the chips by an extra quarter cup.
Pour the batter into the prepared pan, spreading it evenly with the spatula. The surface should be smooth, with a slight dome in the center—this will level out as it bakes. Give the pan a gentle tap on the countertop to release any large air bubbles; you’ll hear a soft “thud” that signals a uniform bake.
Slide the pan into the preheated oven and bake for 20‑25 minutes. The edges will start pulling away from the sides, and a faint crust will form on top. Insert a toothpick into the center; it should come out with a few moist crumbs but no wet batter. The aroma at this stage is intoxicating—dark chocolate, caramelized maple, and a whisper of vanilla filling the kitchen.
Remove the brownies from the oven and let them cool in the pan for 10 minutes, then lift them out using the parchment overhang and transfer to a wire rack. Cooling is essential; it lets the interior set and the flavors meld. While they’re cooling, you’ll notice the top developing a subtle sheen—this is the signature “crackly” finish that makes them look bakery‑perfect.
That’s it — you did it. But hold on, I've got a few more tricks that'll take this to another level. Stay with me here — this is worth it.
Insider Tricks for Flawless Results
The Temperature Rule Nobody Follows
Most bakers set their oven and forget it, assuming the temperature stays constant. In reality, ovens can fluctuate by up to 25°F. Invest in an oven thermometer and adjust the dial accordingly. I once baked these brownies at a claimed 350°F, but the oven was actually 375°F, resulting in a burnt crust and undercooked center. Keep that thermometer handy, and you’ll achieve a consistently perfect bake every time.
Why Your Nose Knows Best
Don’t rely solely on a timer. Your nose is a far more reliable indicator of doneness. When the brownies emit a deep, toasted chocolate aroma and the edges start to pull away, they’re ready. If the scent is still faint, give them an extra 2‑3 minutes. Trusting your senses prevents over‑baking, which can turn a fudgy masterpiece into a dry brick.
The 5‑Minute Rest That Changes Everything
After removing the brownies from the oven, let them rest in the pan for exactly five minutes before transferring to a rack. This brief pause allows the steam to finish cooking the interior gently, resulting in a softer crumb. Skipping this rest will make the brownies crumble when you cut them, and you’ll lose that coveted melt‑in‑your‑mouth feel.
Chocolate Chip Distribution Hack
To avoid clumping of chocolate chips at the bottom, toss them in a tablespoon of flour before folding them into the batter. The flour coats each chip, creating a barrier that keeps them suspended evenly throughout the batter. This trick ensures every bite gets a perfect chocolate burst.
Nut Toasting Secret
If you love the crunch of walnuts or pecans, toast them in a dry skillet for 3‑4 minutes over medium heat before adding to the batter. The heat releases their natural oils, enhancing their flavor and giving the brownies a richer, nuttier profile. A friend tried skipping this step once—let's just say the nuts tasted raw and the overall experience suffered.
Creative Twists and Variations
This recipe is a playground. Here are some of my favorite ways to switch things up:
Mocha Madness
Swap half of the maple syrup for strong brewed espresso and add a teaspoon of instant coffee granules. The result is a brownie that whispers of coffee shop decadence, perfect for a mid‑afternoon pick‑me‑up. Pair with a splash of milk for an espresso‑brownie latte.
White Chocolate Raspberry
Replace dark chocolate chips with white chocolate chips and fold in fresh raspberry puree (about ¼ cup). The tartness of the raspberries cuts through the richness, while the white chocolate adds a buttery sweetness. This variation feels like a sophisticated dessert for a dinner party.
Peanut Butter Swirl
Drop dollops of natural peanut butter on top of the batter before baking, then use a knife to swirl it through. The salty‑sweet peanut butter ribbons create a delightful contrast with the chocolate, reminiscent of a classic PB‑J but way more grown‑up.
Spiced Autumn
Add a teaspoon of pumpkin spice and a half cup of canned pumpkin puree (reduce maple syrup by 2 tablespoons). The warm spices and pumpkin flavor make these brownies a perfect fall treat, especially when served warm with a scoop of vanilla ice cream.
Protein Boost
Incorporate a scoop (about 30 g) of unflavored whey or plant‑based protein powder into the dry ingredients. This ups the protein content without altering the flavor dramatically, ideal for athletes who want a post‑workout treat that still feels indulgent.
Gluten‑Free Oat Flour
If you’re allergic to nuts, swap the almond flour for oat flour. The texture becomes slightly lighter, and the flavor takes on a subtle oat‑sweetness. Make sure the oat flour is certified gluten‑free if you have celiac disease.
Storing and Bringing It Back to Life
Fridge Storage
Allow the brownies to cool completely, then cut them into squares and store in an airtight container in the refrigerator. They’ll stay fresh for up to 5 days. The yogurt helps maintain moisture, so you won’t notice any drying out.
Freezer Friendly
Wrap each brownie individually in plastic wrap, then place them in a zip‑top freezer bag. They’ll freeze solid for up to 3 months. When you’re ready to enjoy one, let it thaw at room temperature for 15 minutes, then give it a quick microwave zap (10‑15 seconds) for that just‑baked warmth.
Best Reheating Method
To revive that fresh‑out‑of‑the‑oven feel, preheat a skillet over low heat, add a tiny splash of water (about a teaspoon) to the pan, and place a brownie slice inside, covering with a lid. The steam will gently re‑moisturize the crumb, and the bottom will get a slight crisp. This trick works better than a microwave, which can make the brownie rubbery.