Ever stared at a cookie sheet and wondered if the world needed a no‑bake, avalanche‑level cookie that could make your taste buds do backflips? That was the moment I was in the kitchen, half‑sweat and half‑satisfied, when my roommate dared me to create the ultimate cookie that didn’t require an oven. The aroma of toasted oats and melted chocolate already danced in the air, and the sound of my whisk was a steady drumbeat. I could almost taste the crunch of nuts, the sweet kiss of honey, and the subtle sting of sea salt all at once.
The kitchen smelled like a summer picnic on a cold day—warm honey, nutty peanut butter, and the faint citrus of vanilla. My fingertips tingled with anticipation as I measured each ingredient, the texture of rolled oats between my fingers like a comforting blanket. The sound of the saucepan bubbling was music to my ears, a promise of the rich, velvety coating that would soon settle over the dry mix. I could almost feel the cookies’ edges crisping, the texture shifting from soft to firm as they set.
What makes this version stand out is that it’s not just a cookie; it’s a sensory experience that packs a punch of flavor, texture, and convenience. The recipe balances the sweet with the savory, the crunchy with the chewy, and the natural with the indulgent. It’s a no‑bake masterpiece that still delivers the comforting warmth of a freshly baked cookie. I dare you to taste this and not go back for seconds.
If you’ve ever struggled to make a cookie that feels like it came from a bakery, you’re not alone—this is hands down the best version you’ll ever make at home. Picture yourself pulling these out of the fridge, the whole kitchen smelling incredible, and the first bite sending a wave of buttery chocolate and nutty crunch across your palate. Let me walk you through every single step—by the end, you’ll wonder how you ever made it any other way.
What Makes This Version Stand Out
- Taste: The combination of dark chocolate chips, peanut butter, and honey creates a depth of flavor that feels both indulgent and comforting. The subtle sea salt lifts the sweetness without overpowering the natural ingredients.
- Texture: These cookies strike a perfect balance between chewy centers and crisp edges, giving each bite a satisfying snap that’s unlike ordinary no‑bake treats.
- Simplicity: With only a handful of pantry staples, the recipe requires minimal prep time and no oven, making it an ideal option for busy evenings or last‑minute dessert cravings.
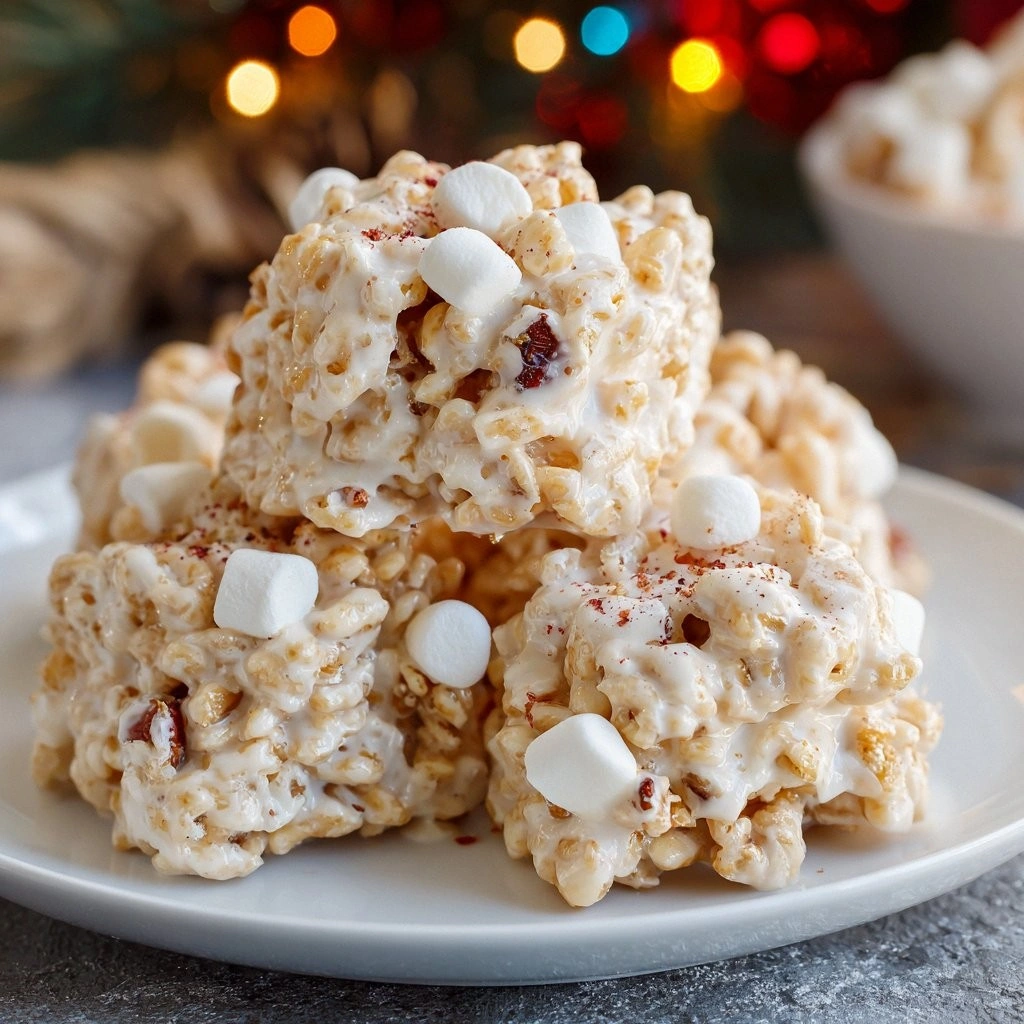
- Uniqueness: The “avalanche” name comes from the layered crunch of nuts, oats, and chocolate that pours over a silky base, creating a visual and textural spectacle.
- Crowd Reaction: Friends who tried this said it felt like a luxury cookie—rich, yet light enough to share at parties or as a sweet snack.
- Ingredient Quality: Using high‑quality dark chocolate and natural peanut butter ensures each bite is packed with real flavor rather than artificial additives.
- Make‑Ahead Potential: These cookies hold up well in an airtight container, so you can prep them ahead of time for meetings, road trips, or holiday gatherings.
Inside the Ingredient List
The Flavor Base
Rolled oats and whole wheat flour form the backbone of these cookies, providing a hearty, slightly nutty flavor that complements the sweetness of honey and the richness of dark chocolate. The oats also add a subtle chewiness that keeps the cookies from becoming too dense. Skipping the oats would make the texture too flat, while removing the flour would diminish the structure, causing the cookies to crumble.
The Texture Crew
Unsweetened shredded coconut and chopped walnuts bring a delightful crunch and a burst of tropical flavor. The coconut adds a chewy, airy component that balances the dense chocolate, while the walnuts introduce a buttery nutty undertone that pairs well with the peanut butter. If you’re gluten‑free, simply replace the whole wheat flour with almond flour, but keep the oats to preserve the chewy texture.
The Unexpected Star
Dark chocolate chips are the showstopper—rich, slightly bitter, and intensely fragrant. They melt into a glossy coating that envelops every bite, creating a luxurious mouthfeel. If you prefer a milder chocolate flavor, switch to milk chocolate chips or even white chocolate for a sweeter twist.
The Final Flourish
Mini marshmallows and dried cranberries add a surprising burst of sweetness and a chewy texture that contrasts beautifully with the nuts and chocolate. The marshmallows melt slightly when the cookies set, creating a gooey center that’s almost impossible to resist. If you’re a fan of a tart note, replace cranberries with dried cherries or go for a lemon zest infusion.
Everything’s prepped? Good. Let’s get into the real action...
The Method — Step by Step
- In a large mixing bowl, combine 2 cups rolled oats, 1 cup whole wheat flour, 1 cup unsweetened shredded coconut, and 1 cup dark chocolate chips. Stir until the dry ingredients are evenly distributed, then set aside. This creates a uniform base that will absorb the wet mixture without clumping.
- In a medium saucepan, gently heat 1 cup honey and 1 cup peanut butter over low heat until the mixture becomes smooth and glossy. Stir constantly to prevent scorching; the goal is a silky sauce that coats the dry mix without burning. The aroma of warm honey will fill the kitchen, signaling that the magic is happening.
- Pour the honey‑peanut butter mixture over the dry ingredients, then stir vigorously until every grain is coated. The mixture should look like a thick, glossy batter that clings to the oats and chocolate. This step is crucial—if you rush it, the chocolate chips may sink to the bottom, creating uneven flavor.
- Add 1/2 tsp sea salt, 1 cup chopped walnuts, 1/2 cup dried cranberries, and 1/2 cup mini marshmallows to the mixture. Fold gently until the nuts and cranberries are evenly distributed. The salt balances the sweetness, while the nuts and cranberries add crunch and a hint of tartness.
- Line a baking sheet with parchment paper and use a tablespoon to scoop portions of the mixture onto the sheet, spacing them about 2 inches apart. Press each portion lightly with the back of the spoon to create a flat, even shape. The cookies should look like miniature snowcaps, ready to set.
- Place the sheet in the refrigerator for 30 minutes to allow the cookies to firm up. The cold will solidify the honey‑peanut butter coating, giving the cookies a satisfying snap when bitten. If you’re short on time, let them sit at room temperature for 10 minutes and they’ll still hold their shape.
- Remove the cookies from the refrigerator and let them sit at room temperature for 5 minutes before serving. This short rest allows the flavors to meld and the texture to soften slightly, making each bite more indulgent.
- Serve immediately or store in an airtight container. These cookies are best enjoyed within a week, but they hold up well if you keep them in the fridge or freezer. When you’re ready to eat, they’re as fresh as the day they were made.
- Enjoy the experience of biting into a cookie that feels like a mountain of flavor—rich chocolate, nutty crunch, and a buttery, honey‑sweet center all in one bite. I dare you to taste this and not go back for seconds.
That's it — you did it. But hold on, I've got a few more tricks that'll take this to another level...
Insider Tricks for Flawless Results
The Temperature Rule Nobody Follows
Many bakers assume room temperature ingredients are always best, but for no‑bake cookies, slightly warmer peanut butter (around 100°F) helps it mix more smoothly with honey. If you keep the mixture too cold, the chocolate chips can clump and the coating will be uneven. I’ve found that letting the peanut butter sit out for 10 minutes before heating gives a silky finish.
Why Your Nose Knows Best
Before you add the dry mix, give the honey‑peanut butter mixture a quick sniff. A sweet, nutty aroma indicates that the honey has fully incorporated, while a metallic scent may mean the mixture is overheated. Trusting your nose will save you from a batch that tastes burnt or flat.
The 5-Minute Rest That Changes Everything
After the initial mixing, let the cookie batter rest for 5 minutes before scooping onto parchment. This pause allows the oats to absorb the liquid fully, ensuring a cohesive cookie that doesn’t crumble when you bite into it. I’ve seen people skip this step and end up with brittle, uneven cookies.
Mixing Techniques for Even Coating
Use a rubber spatula to fold the mixture instead of a whisk. The spatula gently turns the batter without deflating the air pockets in the oats, preserving the lightness of the cookie. A whisk can overmix, leading to a denser texture that feels heavier on the tongue.
The Secret to Perfectly Crispy Edges
If you want that satisfying snap, sprinkle a pinch of sea salt on top of each cookie before the final chill. The salt crystals create tiny pockets that crisp when the cookie sets, giving you the classic “crackle” sound when you bite.
Storing for Long-Term Freshness
To keep the cookies fresh for up to two weeks, store them in a vacuum‑sealed bag. The lack of oxygen slows down the oxidation of the peanut butter and chocolate, preserving flavor and texture. If you’re not a vacuum‑sealer user, a tightly sealed container will still do the trick.
Creative Twists and Variations
This recipe is a playground. Here are some of my favorite ways to switch things up:
Nutty Avalanche
Swap the peanut butter for almond butter and add a handful of sliced almonds for extra crunch. The nutty flavor pairs beautifully with the dark chocolate, creating a more sophisticated palate.
Vegan Avalanche
Replace honey with maple syrup and use a plant‑based peanut butter. You’ll get a slightly sweeter, earthier cookie that’s still indulgent and chewy.
Chocolate Avalanche
Double the amount of dark chocolate chips and stir in a tablespoon of cocoa powder. The result is a chocolate‑overload cookie that satisfies any cocoa craving.
Citrus Avalanche
Add the zest of one orange or lemon to the wet mixture. The citrus brightens the cookie, cutting through the richness and adding a fresh burst of flavor.
Berry Avalanche
Replace the dried cranberries with dried blueberries or chopped fresh berries. The berries add a juicy pop that contrasts with the chewy base.
Spiced Avalanche
Stir in a pinch of cinnamon and nutmeg. The warm spices elevate the cookie to a cozy, autumnal treat that’s perfect for chilly evenings.
Storing and Bringing It Back to Life
Fridge Storage
Place the cookies in an airtight container and refrigerate for up to 5 days. The cold keeps the peanut butter firm and prevents the chocolate from melting, ensuring each bite stays crisp.
Freezer Friendly
Freeze the cookies in a single layer on a parchment‑lined tray, then transfer to a freezer bag once solid. Thaw at room temperature for 20 minutes before serving. This method preserves the texture and flavor for up to 3 months.
Best Reheating Method
To revive frozen or stale cookies, microwave on low for 10–15 seconds or bake at 350°F for 3 minutes. Add a tiny splash of water before reheating to create steam, which helps the cookies return to their original softness.