I still remember the day I tried to make protein bars from scratch, only to end up with a sticky, crumbly mess that tasted like a gym bag on a hot day. The kitchen smelled of burnt peanut butter and scorched oats, and I was about to abandon the project when a friend dared me to finish it and taste it. I took a deep breath, pulled out a handful of protein powder, and decided to treat the disaster as an experiment. That moment, my culinary confidence was shaken, but the promise of a tasty, high‑protein snack kept me going. Now, after countless tweaks and a dash of culinary courage, I can confidently say this is hands down the best version you'll ever make at home.
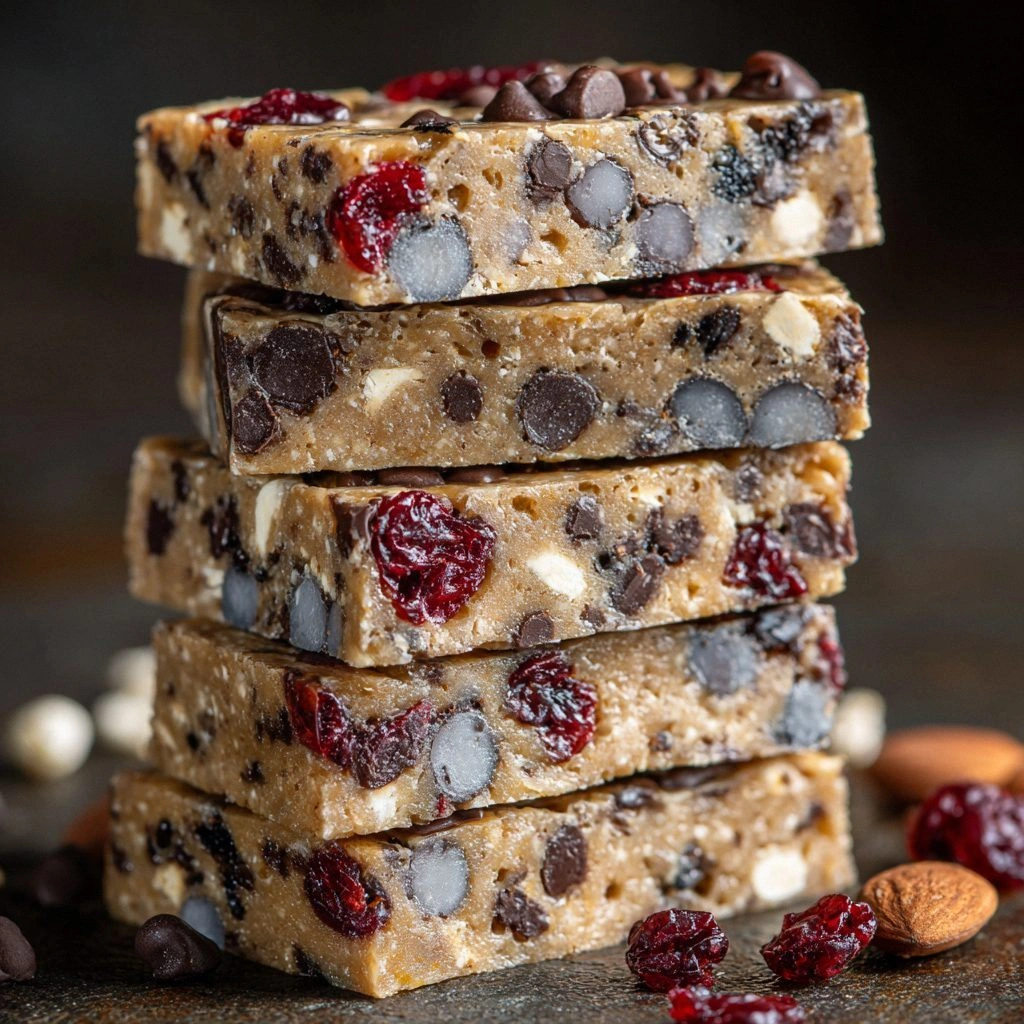
Picture yourself pulling the finished bars out of the pan, the whole kitchen smelling incredible, the edges crisping into a golden crust while the center stays soft and chewy. The first bite is a symphony of textures: a buttery peanut butter core, a hint of sweet honey, and a pop of chocolate chips that melt into a silky glaze. The flavor profile is balanced, not too sweet, with a subtle vanilla undertone that keeps the bars from feeling like dessert. This isn’t just a snack; it’s a protein-packed hug that fuels your day and satisfies your cravings. If you’ve ever struggled with bland or overly sweet protein bars, you’re not alone—and I’ve got the fix.
What makes this version stand out is the intentional layering of ingredients and the no‑bake method that preserves every flavor note. The bars hold together without the need for heat, so the natural sweetness of honey and dried cranberries is never caramelized into an over‑baked mess. I’ve found that using a blend of rolled oats and protein powder creates a chewy base that’s still light enough to bite through. The addition of chia and flaxseed not only boosts the omega‑3 content but also gives the bars a silky, almost mousse‑like interior. Every ingredient is chosen for its functional benefit—texture, flavor, or nutritional punch—so the end result is a balanced, satisfying bite every time. And the best part? You can prep the entire batch in under an hour and store them for a week or freeze for a month.
I dare you to taste this and not go back for seconds, because the flavor is so addictive that you’ll be tempted to sneak a third bar before breakfast. The next part of this post will walk you through every single step, from the first stir to the final slice, and by the end, you’ll wonder how you ever made it any other way. Get ready for a recipe that’s simple, versatile, and downright delicious.
What Makes This Version Stand Out
Flavor: The combination of honey, dried cranberries, and dark chocolate chips creates a complex taste profile that feels indulgent yet healthy.
Texture: A chewy core with a slightly crisp exterior gives each bite a satisfying contrast that keeps you coming back for more.
Nutrition: With 25 grams of protein per serving, these bars are a powerhouse for muscle recovery and satiety.
Convenience: No baking required—just mix, press, chill, and cut, making it perfect for busy mornings.
Versatility: Swap in your favorite nut butter or protein powder flavor to tailor the bars to your taste.
Make‑ahead Potential: Freeze the bars for up to a month, and they thaw into the same delightful texture.
Ingredient Quality: Using high‑quality, minimally processed ingredients ensures maximum flavor and nutrition.
Alright, let's break down exactly what goes into this masterpiece…
Inside the Ingredient List
The Flavor Base
Rolled oats form the backbone of the bars, providing a hearty, nutty flavor that complements the sweet accents. They also add bulk and fiber, making the bars more filling than a typical snack. If you skip the oats, the texture becomes too soft and the bars may fall apart. For a gluten‑free version, substitute with certified gluten‑free oats, but keep the quantity the same.
Vanilla protein powder is the star of the show, delivering a clean protein hit without overpowering sweetness. It also helps bind the mixture together, giving the bars a firm structure. If you’re allergic to whey, try a plant‑based protein powder like pea or brown rice for a comparable protein boost.
The Texture Crew
Natural peanut butter adds a rich, buttery flavor that lingers on the palate. Its fat content helps keep the bars moist and prevents them from becoming too dry. If you prefer a different nut butter, almond or cashew works well, but note that the flavor profile will shift slightly.
Honey is the sweetener of choice because it’s natural, has a lower glycemic index than refined sugar, and adds a subtle floral note. The honey also acts as a natural binder, helping the mixture hold together without the need for heat. For a vegan version, replace honey with maple syrup or agave nectar.
The Unexpected Star
Dried cranberries bring a tart burst that cuts through the sweetness of honey and chocolate. They also provide antioxidants and a pleasant chewiness. If you don’t have cranberries on hand, raisins or dried apricots can be a suitable alternative, though they’re sweeter.
Dark chocolate chips add a rich, slightly bitter counterpoint that elevates the overall flavor. They melt slightly when the bars are stored, creating a glossy glaze on the surface. Choose a high‑cocoa percentage for a less sugary finish.
The Final Flourish
Chia seeds and flaxseed meal are the unsung heroes that boost omega‑3 fatty acids, fiber, and protein. They also help stabilize the bars, preventing them from becoming crumbly. If you’re allergic to seeds, you can omit them, but the bars will be less nutrient‑dense.
Almond milk is added to help bind the mixture and create a slightly moist interior. It also reduces the overall calorie count compared to whole milk. You can use any plant‑based milk—coconut, oat, or soy—depending on your taste preference.
Everything's prepped? Good. Let's get into the real action…
The Method — Step by Step
- Begin by lining a 9x13 inch baking dish with parchment paper, ensuring the paper extends over the sides for easy removal. The parchment will keep the bars from sticking and make cleanup a breeze. If you’re short on parchment, a silicone baking mat works just as well. This step sets the stage for a perfectly uniform slice.
- In a large mixing bowl, combine the rolled oats and vanilla protein powder. Stir until the dry ingredients are fully blended, creating a consistent base that will hold the moisture. This dry mix is the foundation; any clumping here will affect the final texture. Give it a quick visual check—there should be no clumps.
- Add the natural peanut butter and honey to the dry mixture. Use a spatula to fold them in until the mixture looks sticky and cohesive. The peanut butter adds richness, while the honey provides the sweet glue that keeps everything together. If the mixture feels too dry, add a tablespoon of almond milk at a time.
- Fold in the dried cranberries and dark chocolate chips, distributing them evenly throughout the batter. These ingredients add bursts of flavor and texture that make each bite exciting. Be careful not to overmix, as you want to preserve the crunch of the cranberries.
- Stir in the chia seeds and flaxseed meal, which will absorb some of the moisture and help set the bars. The seeds also add a subtle nutty flavor and a nutritional boost. If you’re using a plant‑based protein powder, you might need a few extra tablespoons of almond milk to achieve the right consistency.
- Pour the batter into the prepared baking dish, pressing it down firmly with the back of a spoon or your palms. The goal is to create an even layer about 1 inch thick. This step is the moment of truth—if the batter is too loose, the bars will crumble.
- Refrigerate the dish for at least 30 minutes, or until the mixture is firm enough to cut. This chilling step allows the flavors to meld and the texture to set. If you’re in a hurry, you can pop the dish in the freezer for 15 minutes, but be careful not to overfreeze.
- Once the mixture is firm, lift it out of the dish using the parchment paper. Place it on a cutting board and slice into bars or squares, depending on your preference. Use a sharp knife and wipe it clean between cuts for crisp edges.
- Wrap each bar individually in parchment or wax paper for easy storage. If you prefer a firmer bar, you can place them back in the fridge for an additional 10 minutes before wrapping.
- Store the bars in an airtight container at room temperature for up to a week, or freeze for up to a month. When you’re ready to eat, let them sit at room temperature for a few minutes to soften. This final step ensures a perfect bite every time.
That's it — you did it. But hold on, I've got a few more tricks that'll take this to another level…
Insider Tricks for Flawless Results
The Temperature Rule Nobody Follows
While the recipe is no‑bake, the ambient temperature can still affect the final texture. If you’re cooking on a hot day, keep the batter in the fridge for an extra 10 minutes before cutting to ensure it’s firm. This simple tweak prevents the bars from sliding apart when you slice them. I once made a batch on a summer afternoon and the bars were too soft; chilling them longer saved the day.
Why Your Nose Knows Best
Smell the batter as you mix. A sweet, nutty aroma indicates the honey and peanut butter are well incorporated. If the mix smells flat, add a splash of vanilla extract to awaken the flavors. Trust your nose; it’s a reliable guide to the bar’s overall taste.
The 5-Minute Rest That Changes Everything
After pressing the batter into the dish, let it rest at room temperature for five minutes before refrigerating. This brief pause allows the mixture to settle, reducing the chance of cracks forming during chilling. I’ve found this step essential for achieving a smooth surface that’s easy to slice.
The Perfect Press
Press the batter evenly and firmly. A level surface ensures each bar has the same thickness and texture. Use a flat-bottomed glass or a wooden board to apply even pressure. A sloppy press results in uneven bars that crumble.
The Final Seal
Wrap each bar tightly in parchment before freezing. This prevents freezer burn and keeps the flavors intact. When you’re ready to eat, thaw the bars at room temperature for 10–15 minutes; this restores their chewy interior.
Creative Twists and Variations
This recipe is a playground. Here are some of my favorite ways to switch things up:
Citrus Burst
Swap the dried cranberries for dried orange segments and add a teaspoon of orange zest. The citrus brightens the flavor and adds a refreshing zing that pairs well with the chocolate chips.
Spiced Chocolate
Add a pinch of cinnamon, nutmeg, and a splash of espresso powder to the batter. The spices create a mocha‑like flavor that’s perfect for coffee lovers.
Almond Joy
Replace peanut butter with almond butter, use coconut flakes instead of dried cranberries, and add a few drops of coconut extract. The result is a tropical, coconut‑almond bar that feels like a vacation.
Berry Blast
Use dried blueberries or strawberries instead of cranberries and add a tablespoon of freeze‑dried fruit powder for extra flavor. This variation is ideal for a summer snack that feels light yet satisfying.
Savory Twist
Omit the honey, add a tablespoon of nutritional yeast, and sprinkle smoked paprika over the top before chilling. This savory version works great as a quick protein snack between meals.
Vegan Delight
Use a plant‑based protein powder, maple syrup instead of honey, and a dairy‑free chocolate. The bars remain protein‑dense and chewy, proving that vegan can be just as indulgent.
Storing and Bringing It Back to Life
Fridge Storage
Store the bars in an airtight container at room temperature for up to a week. The cool environment keeps them firm without drying them out. If the bars become too hard, let them sit at room temperature for a few minutes before eating.
Freezer Friendly
Wrap each bar individually in parchment or foil, then place them in a freezer bag. They’ll keep for up to a month. When you’re ready to eat, thaw at room temperature for 10–15 minutes.
Best Reheating Method
To revive the texture, add a tiny splash of water to the bars before microwaving on low for 15–20 seconds. The water creates steam, restoring the chewy interior without drying them out. This trick works wonders if the bars have become overly dry from storage.