I remember the night I tried to impress my roommate with a homemade pie that would make her say, “I’ve never tasted anything like this.” The kitchen was a battlefield: flour dusted the countertops, the butter had turned into a stubborn block, and the oven was still cooling down from a last-minute lasagna. I was halfway to surrender when an old family recipe slipped into my mind like a secret weapon. That recipe was a salted caramel apple pie that had survived generations, each version more daring than the last, and I was determined to outdo them all.
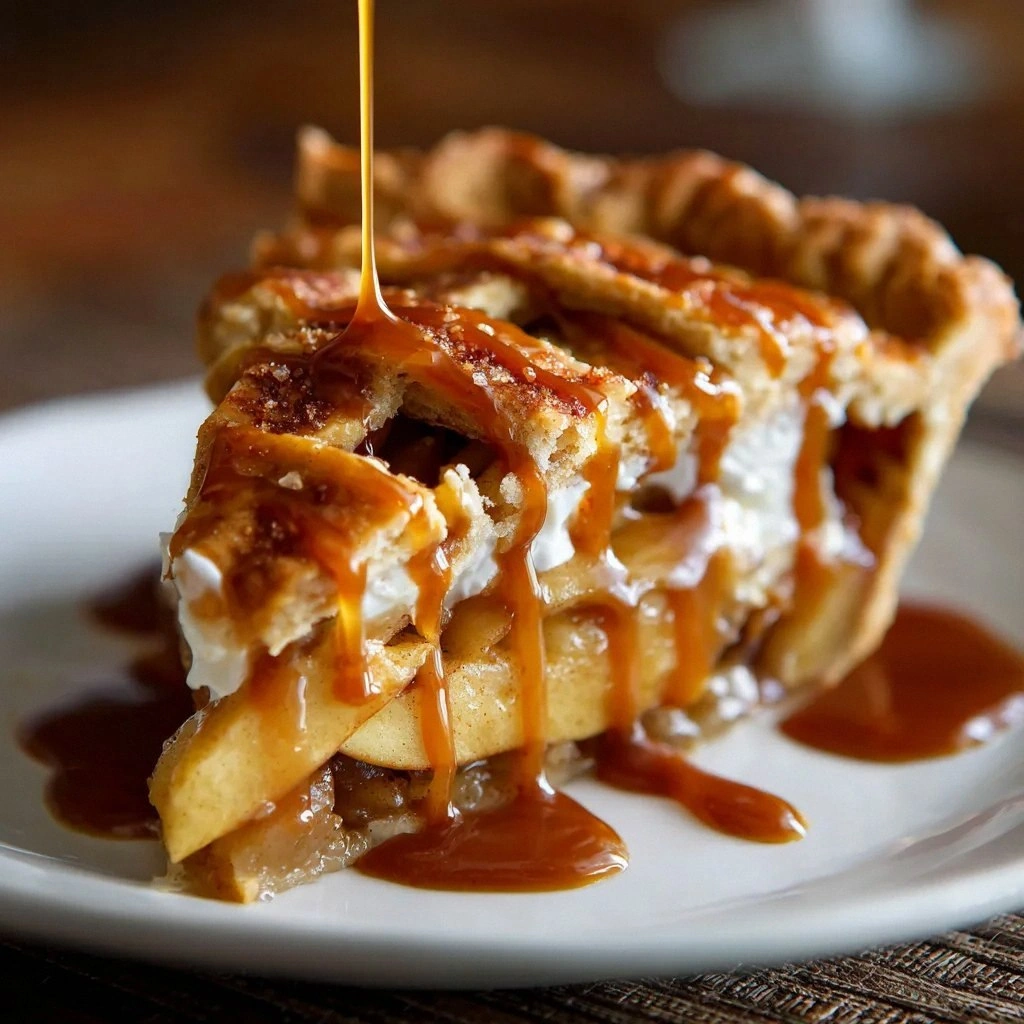
Picture this: a golden crust crackling with buttery edges that shatter like thin ice, a filling that oozes caramelized sweetness, and a hint of sea salt that lingers on your tongue. The aroma of cinnamon and nutmeg mingles with the buttery scent of the crust, while the apples release a crisp, tart perfume as they cook. Every bite is a symphony of textures—soft, chewy apples, silky caramel, and a flaky, buttery shell that melts in your mouth. It’s a dessert that feels like a hug in a pie crust.
What makes this version stand out is not just the caramel or the crust; it’s the meticulous layering of flavors and the intentional use of ingredients that elevate the dish. I’ve tweaked the classic recipe to strike the perfect balance between sweet and salty, and I’ve added a few culinary shortcuts that save time without compromising flavor. The result? A pie that is hands down the best version you’ll ever make at home, a dessert that will become your signature when you host guests, and a story that you’ll tell for years.
I dare you to taste this and not go back for seconds. The next few sections will walk you through every single step, from the crust that feels like a cloud to the caramel that coats the apples like velvet. By the end, you’ll wonder how you ever made it any other way. Let me walk you through every single step — by the end, you'll wonder how you ever made it any other way.
What Makes This Version Stand Out
- Flavor: The caramel sauce is infused with sea salt, turning sweetness into a sophisticated, savory note that lingers.
- Texture: A buttery, flaky crust that melts in your mouth, paired with apples that remain firm yet tender.
- Ease: The crust can be pre-made and refrigerated, saving you minutes on busy evenings.
- Visual Appeal: The caramel glaze gives the pie a glossy, almost glass-like finish that’s Instagram‑worthy.
- Versatility: The recipe is a playground for substitutions—different apple varieties, spices, or even a drizzle of bourbon.
- Make‑Ahead: The pie can be assembled a day ahead; the caramel will thicken and the crust will keep its crispness.
- Crowd‑Pleaser: The combination of sweet, salty, and spicy flavors appeals to a wide range of palates.
Alright, let's break down exactly what goes into this masterpiece. The next box will give you a quick kitchen hack to make your crust even more flaky.
Inside the Ingredient List
The Flavor Base
All-purpose flour is the backbone of your pie crust, providing structure and flakiness. It’s the silent hero that holds everything together while giving you a light, airy texture. Skipping flour would turn your crust into a soggy mess. For those who love a little crunch, you can add a tablespoon of cornmeal for a subtle nutty crunch.
The Texture Crew
Unsalted butter is chilled and diced, adding richness and flavor to the crust. Using unsalted allows you to control the saltiness, which is crucial when you’re balancing the sweet caramel. The butter’s temperature is key; if it’s too warm, it will melt into the flour and produce a greasy crust. A pinch of salt and a tablespoon of sugar balance the butter’s richness and bring out the apples’ natural sweetness.
The Unexpected Star
Salted caramel sauce is the star of the show. It’s a glossy, silky drizzle that coats the apples like velvet. The caramel’s buttery base is enhanced by a generous pinch of sea salt, turning a simple sauce into a flavor explosion. If you can’t find a store-bought version, a homemade caramel made with brown sugar and butter will work just as well.
The Final Flourish
The egg, beaten and brushed on the crust, gives it a lovely golden finish that’s hard to resist. The egg also seals the crust, preventing it from cracking during baking. If you’re vegan, a splash of oat milk works well to achieve a similar golden crust. The lemon juice brightens the apple filling and prevents browning, keeping the apples vibrant.
Everything's prepped? Good. Let's get into the real action.
The Method — Step by Step
- Prepare the Crust: In a large bowl, combine 2 cups of flour, 1 tsp salt, and 1 tbsp sugar. Add diced cold butter and rub it into the flour until the mixture resembles coarse crumbs. This is the moment the butter’s fat starts to melt, giving the crust its flakiness. Sprinkle 4 tbsp of ice water over the mixture, stirring until the dough just comes together. If it’s too dry, add a splash more water.
- Shape the Dough: Turn the dough onto a lightly floured surface. Pat it into a disc about 1/2 inch thick. Wrap it in plastic wrap and refrigerate for at least 30 minutes; chilling solidifies the butter, ensuring a flaky crust. I’ve found that a 30‑minute chill works better than a full hour for a quick bake.
- Roll Out the Bottom: On a floured surface, roll the dough into a 12‑inch circle, then transfer it to a 9‑inch pie dish. Gently press the dough into the dish, making sure it reaches the edges. Trim any excess dough with a knife, leaving a 1‑inch overhang. Fold the overhang under itself and crimp the edges for a decorative touch.
- Blind Bake the Crust: Preheat the oven to 375°F (190°C). Line the crust with parchment paper and fill it with pie weights or dried beans. Bake for 20 minutes, then remove the weights and parchment. The crust should be lightly golden but not fully cooked; this prevents it from becoming soggy when the filling is added.
- Prepare the Apples: Peel, core, and slice 6 apples (3 Granny Smith, 3 Honeycrisp). Toss the slices with 1 tsp cinnamon, 0.25 tsp nutmeg, and 2 tbsp lemon juice. The lemon juice keeps the apples from browning and adds a bright citrus note that cuts through the caramel’s sweetness. Mix gently to coat all slices evenly.
- Assemble the Filling: Spread the apple mixture evenly over the pre-baked crust. Drizzle 1 cup of salted caramel sauce over the apples, ensuring every slice gets a generous coat. The caramel will set into a glossy glaze as it bakes, creating a stunning visual effect. If you like a thicker glaze, you can swirl a tablespoon of extra caramel into the top.
- Top Crust: Roll out the remaining dough into a 12‑inch circle and lay it over the filling. Trim and crimp the edges to seal. Cut slits in the top crust to allow steam to escape. This prevents the crust from puffing up and ensures even baking.
- Brush and Bake: Beat 1 egg and brush it over the top crust; this gives a beautiful golden finish. Place the pie on a baking sheet and bake at 375°F (190°C) for 30 minutes, or until the crust is golden and the filling is bubbling. The smell of baking apples and caramel should fill the kitchen, making everyone’s mouths water.
- Cool and Serve: Remove the pie from the oven and let it cool on a wire rack for at least 20 minutes before slicing. Cooling allows the caramel to set, preventing a sticky mess. Slice with a hot knife for clean edges. Serve warm with a scoop of vanilla ice cream for an extra indulgent touch.
That’s it — you did it. But hold on, I’ve got a few more tricks that’ll take this to another level. The next section will give you insider tips that will elevate your pie from good to legendary.
Insider Tricks for Flawless Results
The Temperature Rule Nobody Follows
Many bakers bake pies at 350°F, but 375°F is the sweet spot for caramelizing the sugars in the sauce while keeping the crust from browning too quickly. The higher temperature creates a crisp crust and a glossy glaze. If you’re using a convection oven, lower the temperature by 25°F to avoid overcooking.
Why Your Nose Knows Best
The aroma of caramelizing sugar is a reliable indicator that your pie is halfway there. When you smell the caramel bubbling, you know the sugars are caramelizing properly. If the scent is flat, increase the oven temperature slightly. A strong, buttery scent signals that the crust is crisping up nicely.
The 5-Minute Rest That Changes Everything
After removing the pie from the oven, let it rest for 5 minutes before slicing. This short rest allows the caramel to set, preventing a sticky mess. It also lets the filling settle, making each slice cleaner. I’ve seen people cut straight into the pie and end up with a gooey mess.
Use a Skillet for Extra Caramel
If you want a thicker caramel glaze, melt the sauce in a skillet before pouring it over the apples. Heat it until it reaches a silky consistency, then drizzle. This technique gives the pie a richer, more decadent glaze. Just be careful not to overheat; caramel burns quickly.
Keep the Crust Cool
If you’re making the crust ahead of time, store it in an airtight container at room temperature. The crust will stay flaky and fresh for up to 24 hours. If you’re freezing it, wrap it tightly in foil and place it in a freezer bag. Thaw overnight before baking.
Serve with a Twist
For a boozy twist, drizzle a splash of bourbon over the caramel before baking. The alcohol adds depth and a subtle warmth that pairs perfectly with the apples. If you’re serving to kids, stick with the classic version and let them enjoy the pure caramel flavor.
Creative Twists and Variations
This recipe is a playground. Here are some of my favorite ways to switch things up:
Spiced Apple Caramel Pie
Add a pinch of ground ginger and a dash of clove to the apple mixture for a warm, spicy kick. The spices complement the caramel and give the pie a holiday feel. This version is perfect for a cozy winter gathering.
Nutty Caramel Apple Pie
Fold chopped pecans or walnuts into the apple filling. The nuts add a crunchy texture and a nutty flavor that pairs beautifully with the caramel. Sprinkle toasted nuts on top before serving for an extra crunch.
Cheesecake Caramel Apple Pie
Replace the top crust with a layer of cream cheese batter, similar to a cheesecake crust. This gives the pie a rich, creamy center. The caramel sauce then works as a drizzle, creating a decadent dessert.
Chocolate Caramel Apple Pie
Swirl in melted dark chocolate into the caramel sauce before drizzling over the apples. The bitterness of the chocolate balances the sweetness, creating a complex flavor profile. This version is great for chocolate lovers.
Vegan Salted Caramel Apple Pie
Use vegan butter and a plant‑based egg replacer, such as a flax egg or aquafaba. Substitute the salted caramel with a dairy‑free caramel sauce. The result is a completely plant‑based dessert that still delivers on flavor.
Mini Caramel Apple Pies
Bake in a muffin tin instead of a 9‑inch dish. Each mini pie is a bite‑size treat that’s perfect for parties or a dessert bar. The mini pies bake slightly faster, so keep an eye on them.
Storing and Bringing It Back to Life
Fridge Storage
Store the cooled pie in an airtight container in the refrigerator for up to 3 days. The caramel will remain glossy, and the crust will stay flaky. When ready to serve, let the pie sit at room temperature for 10 minutes to bring out the flavors.
Freezer Friendly
Wrap the pie tightly in foil and place it in a freezer bag. Freeze for up to 2 months. To thaw, let it sit in the refrigerator overnight. The crust may soften slightly, but reheating will restore its crispness.
Best Reheating Method
Preheat the oven to 350°F (175°C). Place the pie on a baking sheet and bake for 10–15 minutes, or until warmed through. Add a splash of water to the bottom of the pan to create steam, which keeps the crust from drying out. Let it cool for a few minutes before slicing.