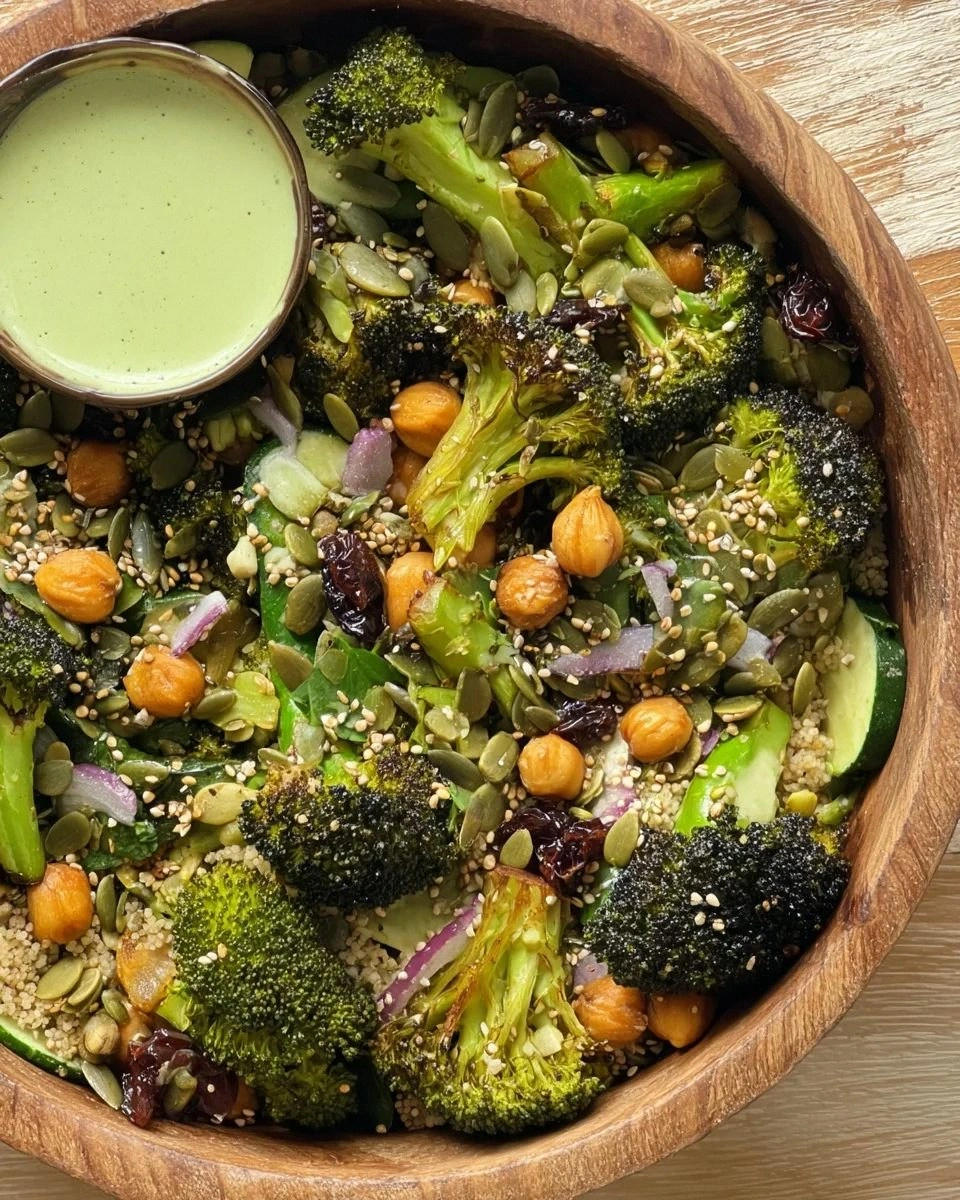
I burned an entire sheet pan of broccoli once. Not just charred — we're talking blackened, smoking, set-off-the-fire-alarm kind of ruined. My dinner guests were arriving in twenty minutes, the kitchen smelled like a campfire, and I was ready to serve frozen pizza with a side of shame. But here's the twist: after scraping off the cremated bits, the little green nuggets hiding underneath were the most intensely flavored, caramelized bites I'd ever tasted. That kitchen disaster became my obsession, and three years later I'm handing you the perfected version that makes people fight over the last floret.
Picture this: it's Tuesday night, you're starving, and you want something that tastes like it came from that trendy farm-to-table place downtown — but you're in sweatpants and refuse to leave the house. This roasted broccoli salad hits the table looking like a million bucks, all crispy edges and emerald green, tossed with things you probably have in your pantry right now. The first bite is a revelation: those crispy, almost-burnt tips that shatter like thin ice, revealing tender stems that taste like broccoli turned up to eleven. Then come the mix-ins — little surprises that make each forkful different from the last.
I've served this to people who claim they "don't do vegetables" and watched them go back for thirds. I've brought it to potlucks where it outshone the mac and cheese. I've even caught my vegetable-hating nephew sneaking cold leftovers from the fridge at midnight, standing there in his pajamas, fork in hand, looking like he'd discovered buried treasure. This isn't just another salad — it's the gateway drug to loving your greens.
The magic happens when broccoli meets high heat and just the right amount of oil. Most recipes get this completely wrong, treating broccoli like delicate flowers that need gentle care. Nonsense. Broccoli wants to party in a blazing hot oven until its edges blister and its natural sugars caramelize into something that tastes like vegetable candy. Stay with me here — this is worth it. Let me walk you through every single step — by the end, you'll wonder how you ever made it any other way.
What Makes This Version Stand Out
- Restaurant-Quality Roast: We're cranking the oven to 450°F and letting the broccoli get properly charred, not just steamed with a tan. Those crispy, nearly-black edges are where the flavor lives — it's like broccoli turned into popcorn.
- The Temperature Trick: Starting with a cold sheet pan seems backwards, but it's the secret to broccoli that roasts evenly without turning to mush. The gradual heat build-up means tender insides and crispy outsides every single time.
- Flavor Layering Magic: We season at three different stages — before roasting, while it's hot out of the oven, and in the final dressing. Each layer builds complexity until you can't quite figure out why it's so addictive.
- Texture Playground: Crispy roasted florets meet creamy beans, crunchy seeds, and chewy dried fruit. Every bite keeps your mouth guessing and reaching for more.
- Make-Ahead Champion: This salad actually improves as it sits, making it perfect for meal prep or entertaining. The flavors mingle and deepen, turning leftovers into tomorrow's lunch that everyone fights over.
- Pantry-Friendly Flexibility: No specialty ingredients required — swap in whatever nuts, seeds, or dried fruit you have lurking in your cabinets. It's like a clean-out-the-pantry party that somehow always works.
Alright, let's break down exactly what goes into this masterpiece...
Inside the Ingredient List
The Flavor Base
Broccoli is obviously the star here, but not all broccoli is created equal. Look for heads with tight, dark green florets and firm stems — avoid anything yellowing or limp. A fresh head should feel heavy for its size and smell slightly sweet, not cabbagey. Don't toss those stems! Peeled and sliced, they become honey-sweet nuggets that might just be the best part. If you can only find pre-cut florets, that's fine, but try to get the darkest green ones available — they have the most flavor.
Olive oil is your best friend for roasting, but don't reach for the expensive finishing oil here. A good everyday extra-virgin works perfectly, and you need enough to coat every surface generously — skimp on the oil and your broccoli will steam instead of roast. I use about 3 tablespoons per head of broccoli, which seems excessive until you see how it helps achieve those crispy edges. The oil also carries the seasoning, helping salt and pepper stick to every nook and cranny.
The Texture Crew
Chickpeas add heft and protein, transforming this from a side dish into a meal. Use canned for convenience, but here's the trick: drain them well and let them air-dry for ten minutes. Wet chickpeas won't crisp up, and crispy chickpeas are textural gold. When they roast alongside the broccoli, their exteriors turn into little nuggets while the insides stay creamy. If chickpeas aren't your thing, white beans or even roasted nuts work beautifully — just don't skip something substantial.
Pumpkin seeds bring the crunch factor, but here's where you can get creative. Sunflower seeds, slivered almonds, or even crushed tortilla chips all work. The key is adding them during the last few minutes of roasting so they toast without burning. There's something deeply satisfying about the contrast between soft broccoli and crunchy seeds — it's like nature's version of croutons but better for you.
The Unexpected Star
Dried cranberries might seem like an odd addition, but hear me out. Their tart-sweet pop cuts through the richness of the roasted vegetables and adds little bursts of flavor that keep things interesting. Don't like cranberries? Try dried cherries, chopped apricots, or even golden raisins. The dried fruit rehydrates slightly from the heat, becoming jammy little pockets that surprise and delight. Just don't add them too early or they'll burn and turn bitter.
Feta cheese brings the salty, tangy punch that ties everything together. Crumble it over the warm vegetables so it softens slightly but doesn't completely melt. Goat cheese works too if you want something creamier, or skip the cheese entirely and add a handful of sliced olives for a dairy-free version. The salty element is crucial — it balances the sweetness from the roasted vegetables and makes everything taste more intense.
The Final Flourish
Lemon zest and juice brighten everything up, cutting through the richness like a ray of sunshine. Add the zest before roasting — it perfumes the vegetables as they cook — then finish with fresh juice right before serving. Don't even think about using bottled lemon juice here; the fresh stuff makes everything taste alive. A microplane is your best friend for zesting, but the fine side of a box grater works in a pinch.
Fresh herbs take this from good to restaurant-worthy. Parsley is classic, but dill, basil, or even cilantro all bring different personalities to the party. Add them right before serving so they stay vibrant and don't wilt. If all you have is dried herbs, use them in the dressing but skip them as a garnish — dried herbs look like green confetti and taste like nothing.
Everything's prepped? Good. Let's get into the real action...
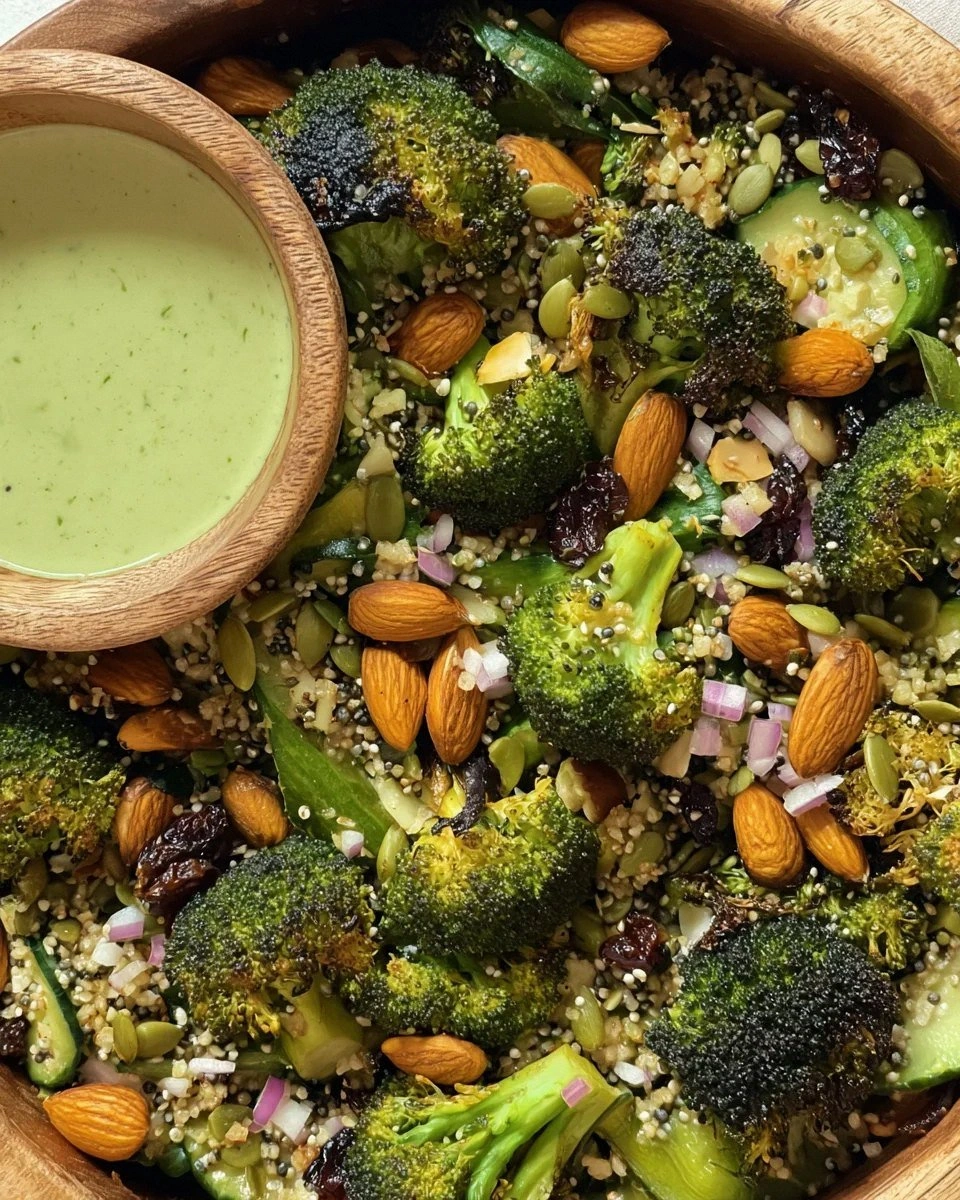
The Method — Step by Step
- Preheat your oven to 450°F, but here's the unconventional part: place your sheet pan in the oven while it heats up. Starting with a hot pan jumpstarts the caramelization process, giving you those crispy edges that make roasted vegetables addictive. This technique works because the vegetables start searing immediately instead of slowly steaming as the pan comes to temperature. While the oven heats, you've got about ten minutes to prep everything else, so move with purpose but don't rush.
- Cut your broccoli into bite-sized pieces, keeping the florets and stems separate. The florets should be about the size of a ping-pong ball — any smaller and they'll burn, any larger and they won't cook through. Peel the tough outer layer from the stems using a vegetable peeler, then slice them into 1/4-inch coins. These stem coins are secret treasures — they roast into sweet, tender morsels that convert even broccoli-haters. Spread everything on a kitchen towel and pat completely dry; water is the enemy of crispiness.
- In a large bowl, toss the dried broccoli with olive oil until every piece is glossy and well-coated. Add salt, pepper, and lemon zest, tossing until evenly distributed. The broccoli should look slightly shiny but not swimming in oil — you want enough to prevent sticking and encourage browning, but not so much that it pools on the pan. Season more aggressively than you think you should; roasting concentrates flavors and under-seasoned vegetables taste flat. Add a pinch of red pepper flakes if you like a subtle heat that builds as you eat.
- Carefully remove the hot pan from the oven — it should be smoking slightly, which is exactly what you want. Immediately spread the broccoli in a single layer, hearing that satisfying sizzle when it hits the metal. That sound? That's the sound of magic happening. Don't stir for the first 15 minutes; let the broccoli develop a deep brown crust on the bottom. This is where most recipes go wrong, constantly stirring and preventing proper caramelization.
- After 15 minutes, use a thin metal spatula to flip the broccoli, scraping up any golden bits stuck to the pan. Add the drained chickpeas at this point, scattering them around the broccoli. The chickpeas need less time to roast, and adding them later prevents them from turning into little pebbles. Return the pan to the oven for another 10-12 minutes, until the broccoli is tender when pierced with a fork and the chickpeas are starting to split and crisp.
- During the last 3 minutes of roasting, sprinkle the pumpkin seeds over everything. They toast quickly and can go from golden to burnt in seconds, so don't walk away. When the seeds smell nutty and look slightly puffed, remove the pan from the oven. Immediately transfer everything to a serving bowl — if you leave it on the hot pan, the broccoli will continue cooking and turn army-green and mushy. This is the moment of truth when you taste a piece and realize you've been making broccoli wrong your entire life.
- While the vegetables are still warm but not piping hot, add the dried cranberries and crumbled feta. The warmth softens the cranberries slightly and takes the chill off the feta without melting it completely. Toss gently — you want to distribute everything evenly without smashing the tender broccoli into mush. Add the fresh lemon juice and herbs, giving everything one final gentle toss. Taste and adjust seasoning; you might need more salt or lemon depending on your ingredients.
- Let the salad sit for at least 10 minutes before serving — this is crucial and where most people mess up. The brief rest allows the flavors to meld, the cranberries to plump slightly, and the temperature to settle into that perfect warm-but-not-hot zone. Serve it slightly warm or at room temperature, never cold from the fridge. Cold roasted broccoli tastes like punishment, but slightly warm? That's when it tastes like someone who loves you made you dinner.
- If you're feeling fancy, reserve some feta and herbs for garnish. A final drizzle of good olive oil and crack of fresh black pepper makes it look restaurant-worthy. But honestly? Once you taste this, you'll be too busy shoveling it into your mouth to worry about presentation. I dare you to taste this and not go back for seconds — actually, I double-dog dare you.
That's it — you did it. But hold on, I've got a few more tricks that'll take this to another level...
Insider Tricks for Flawless Results
The Temperature Rule Nobody Follows
Here's the thing about roasting vegetables: home ovens lie. That 450°F setting might actually be 425°F or 475°F, and 25 degrees makes the difference between caramelized perfection and burnt disappointment. Get an oven thermometer — they're like five bucks and will change your roasting game forever. Place it on the same rack you'll use for roasting, and adjust your dial accordingly. I've been honest — I ate half the batch before anyone else got to try it because my oven runs hot and I didn't know it for years.
Another temperature trick: let your olive oil warm up slightly before tossing with cold broccoli. Cold oil doesn't coat as evenly and can cause the vegetables to steam instead of roast. Just let it sit on the counter while you prep everything else — it doesn't need to be warm, just not ice-cold from the fridge. This tiny detail makes a noticeable difference in how evenly everything browns.
Why Your Nose Knows Best
Forget timers — your nose is the best kitchen tool you have. When roasted broccoli is perfectly done, your kitchen will smell like popcorn and toasted nuts, not like boiled vegetables. If it smells like broccoli soup, you've gone too far. That aroma change happens about 2-3 minutes before visual doneness, giving you just enough time to save dinner. A friend tried skipping this step once — let's just say it didn't end well for her smoke detector.
The sound test works too — when you open the oven, you should hear gentle sizzling, not angry popping or complete silence. Gentle sizzle means the vegetables are releasing moisture and browning properly. No sound means your oven isn't hot enough, while aggressive popping means things are about to burn. Trust your senses; they've been keeping humans alive for millennia.
The 5-Minute Rest That Changes Everything
Patience isn't just a virtue — it's the secret ingredient. When that pan comes out of the oven, everything looks and smells incredible, and you want to dig in immediately. Resist! Letting roasted vegetables rest for just 5 minutes allows the exterior to crisp up as steam escapes. It's like letting a steak rest, but faster and without the meat thermometer anxiety. This is the difference between good roasted vegetables and restaurant-quality ones.
During this rest, the residual heat continues cooking the centers while the outsides stay crispy. It's also when you should season with anything acidic — lemon juice or vinegar added to piping hot vegetables just evaporates and tastes flat. Wait those five minutes, then hit it with acid while it's still warm enough to absorb flavors but not so hot it kills them.
Creative Twists and Variations
This recipe is a playground. Here are some of my favorite ways to switch things up:
Mediterranean Escape
Swap the cranberries for chopped sun-dried tomatoes, use kalamata olives instead of feta, and add a teaspoon of dried oregano to the oil. Finish with fresh parsley and a squeeze of orange instead of lemon. Suddenly you're eating dinner on a Greek island, even if you're actually in your studio apartment in February. The sun-dried tomatoes get chewy and intense, while the orange adds a mellow sweetness that plays beautifully with the briny olives.
Asian-Inspired Version
Replace olive oil with sesame oil, add a tablespoon of soy sauce to the coating, and swap pumpkin seeds for sesame seeds. Use rice vinegar instead of lemon juice, and finish with cilantro and thinly sliced scallions. Add some grated ginger to the oil mixture for an extra layer of flavor. The result tastes like something you'd get at a trendy fusion restaurant, but you made it in your pajamas.
Fall Harvest Edition
Add cubes of butternut squash or sweet potato to roast alongside the broccoli. Swap cranberries for dried cherries, use goat cheese instead of feta, and add some toasted pecans. A drizzle of maple syrup in the final dressing brings everything together in a way that screams autumn comfort. This version is hearty enough to be a vegetarian main course, especially served over quinoa or farro.
Spicy Southwest Style
Add a teaspoon each of chili powder and cumin to your oil mixture, swap the feta for queso fresco, and use pepitas (pumpkin seeds) with a handful of roasted corn. Finish with cilantro and a squeeze of lime. The spices toast beautifully in the oven, creating a smoky depth that pairs perfectly with the sweet-tart cranberries. If you're feeling brave, add a diced jalapeño to roast with the vegetables.
Protein-Packed Power Bowl
Add cubed chicken thighs or tofu to roast on a separate pan, then toss everything together. The chicken juices mix with the vegetables to create a sort of instant sauce, while the tofu gets crispy and golden. This transforms the side dish into a complete meal that'll fuel you through afternoon meetings or evening workouts. My gym-rat neighbor swears by this version for post-workout recovery.
Breakfast-for-Dinner Remix
Roast everything as usual, then top with a fried egg. The runny yolk creates an instant sauce that coats everything in rich, golden deliciousness. Add some everything-bagel seasoning and suddenly it's like eating your vegetables at a trendy brunch spot. Don't knock it until you've tried it — there's something deeply satisfying about vegetables for breakfast, even when breakfast happens at 7 PM.
Storing and Bringing It Back to Life
Fridge Storage
This salad keeps beautifully for up to 4 days in an airtight container, making it perfect for meal prep. Store it without the fresh herbs and final lemon juice — add those just before serving to keep everything vibrant. The flavors actually improve after a day as the ingredients mingle and get cozy. If you've added protein like chicken or tofu, eat it within 3 days to be safe. The broccoli stays surprisingly crisp, unlike sad, wilted lettuce salads that turn into compost overnight.
Freezer Friendly
Here's a game-changer: freeze individual portions on a sheet pan first, then transfer to freezer bags. This prevents clumping and lets you grab exactly what you need. It keeps for 2 months frozen, though the texture of the broccoli will be softer after thawing. The flavor stays incredible, making this a great option for those weeks when you can't even be bothered to chop vegetables. Thaw overnight in the fridge or for a few hours at room temperature — microwaving makes everything sad and mushy.
Best Reheating Method
Okay, ready for the game-changer? Don't reheat this in the microwave unless you enjoy rubbery vegetables. Instead, spread it on a sheet pan and pop it under the broiler for 3-4 minutes, just until warmed through and the edges crisp up again. Add a tiny splash of water before reheating — it steams back to perfection without drying out. If you're in a rush, a hot skillet works too, just don't stir too much. The goal is to warm it through while maintaining some texture, not to recreate the original roast but to make leftovers something you'll actually look forward to.