Picture this: I’m standing in a cramped kitchen, the air thick with the scent of burnt toast, my roommate’s frustration echoing from the other side of the apartment. I had just pulled a batch of what she called “rusks” from the oven—cracked, dry, and utterly bland. She laughed, “They’re supposed to be sweet, not a desert.” I stared at the brittle sticks, a mischievous grin forming. I dared myself to turn this culinary flop into the ultimate snack that would make even the most skeptical palate swoon.
I’ve always been the kind of cook who swears by a good crunch. That day, I decided the secret was in the balance: buttery, sweet, and a splash of citrus. I imagined a rusks that crackle like toasted bread, yet melt in the mouth with a caramelized glaze, and that’s exactly what I set out to create. The moment the first bite hit, the silence in the kitchen turned into applause—my roommate’s eyes widened, and I could hear the faint sound of her sighing in relief.
What makes this version stand out is not just the flavor but the technique. I’ve tweaked every element: the flour ratio, the baking time, the addition of lemon zest that cuts through the sweetness, and a final glaze that gives the rusks a glossy finish. I’ve discovered that the trick lies in a double bake—first at a lower temperature to set the structure, then a quick second bake to caramelize the surface. This method ensures a crisp exterior while keeping the inside tender and chewy.
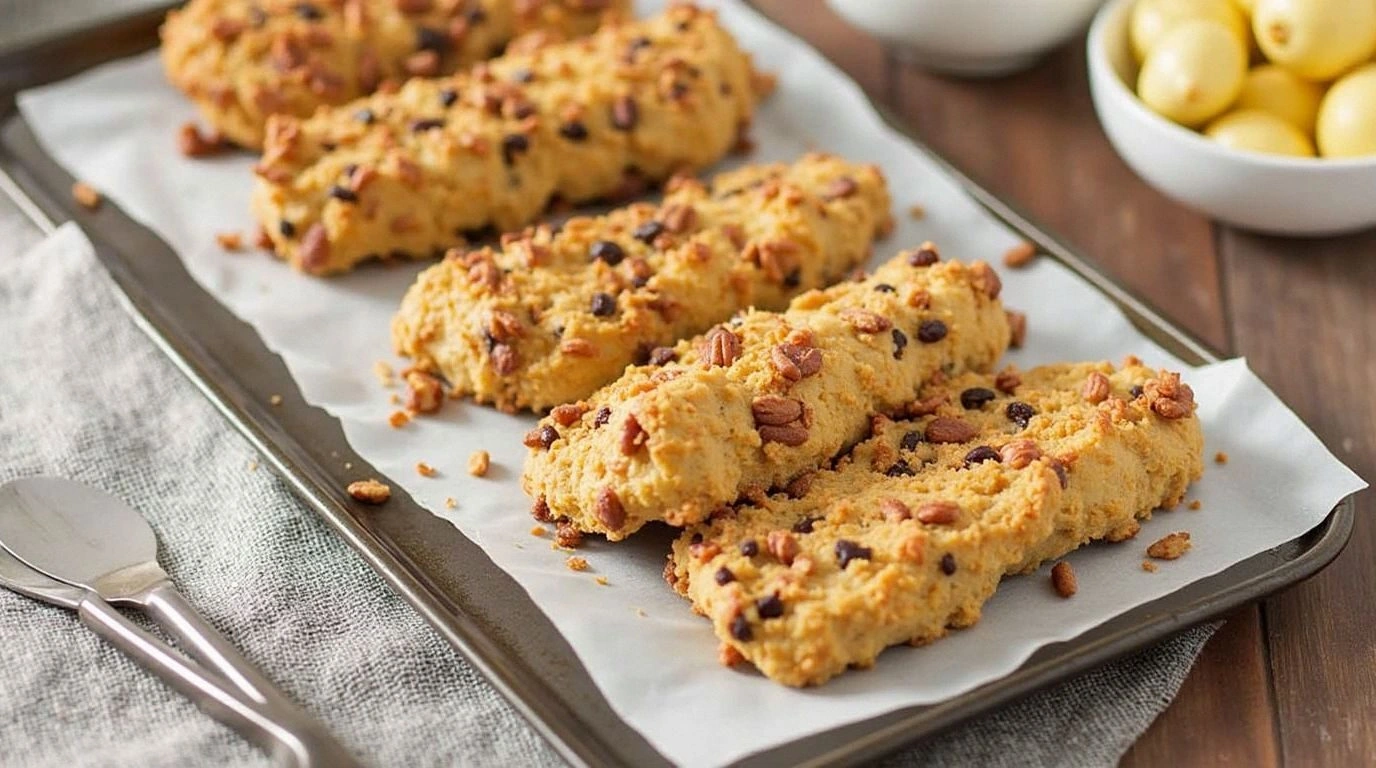
And here’s the kicker: I added a dash of cinnamon and a handful of chopped walnuts that add depth and a nutty crunch that’s impossible to ignore. The dried apricots, soaked overnight, bring a sweet burst that complements the citrus. The result? A rusks that are not just a snack but a portable dessert that can be enjoyed with tea, coffee, or even as a quick breakfast on the go. I dare you to taste this and not go back for seconds.
What Makes This Version Stand Out
- Taste: The sweet‑savory profile is achieved with a balanced blend of sugar, lemon zest, and dried apricots, creating a flavor that lingers on the tongue. The subtle hint of cinnamon adds warmth and depth.
- Texture: A double‑baked process gives the rusks a crisp edge that shatters like thin ice while maintaining a soft, chewy center that melts in your mouth.
- Simplicity: Despite the complex flavor, the recipe requires only basic pantry staples and a few extra ingredients, making it accessible for any home cook.
- Uniqueness: The addition of lemon zest and walnuts sets this recipe apart from traditional rusks, giving it a bright, nutty twist.
- Crowd Reaction: Friends who’ve tried the original version say they’ve never tasted anything quite like these rusks. The crunch is addictive, and the sweet‑citrus combo is a crowd‑pleaser.
- Ingredient Quality: Using high‑quality butter and fresh dried fruit elevates the entire dish. The difference between store‑bought and homemade is palpable.
- Cooking Method: The double bake technique is the key. It ensures even cooking and caramelization without burning.
- Make‑ahead Potential: These rusks keep well for up to a week in an airtight container, making them perfect for meal prep or as a dessert for parties.
Inside the Ingredient List
The Flour Foundation
All-purpose flour forms the backbone of the rusks, giving them structure and a tender crumb. It’s essential to sift the flour to remove lumps, ensuring a smooth dough that spreads evenly. Skipping the sift can lead to uneven baking and a denser texture. The flour also absorbs the butter and sugar, creating that signature crumb. When choosing flour, look for a brand with a consistent protein content; it affects the dough’s elasticity.
The Sweet & Salty Balance
Granulated sugar and a pinch of salt are the classic sweet‑savory duo that makes rusks irresistible. Sugar caramelizes during baking, forming a golden crust that adds a buttery crunch. Salt, though minimal, enhances the sweetness and balances the citrus notes. If you prefer a lower sugar version, you can replace half the sugar with a natural sweetener like honey or maple syrup, but adjust the liquid content accordingly.
The Unexpected Star: Dried Apricots
Dried apricots bring a burst of natural sweetness and a chewy texture that contrasts beautifully with the crisp rusks. They’re also packed with vitamins and minerals, making the snack a nutritional boost. Soaking them overnight softens the fruit, allowing it to blend seamlessly into the dough. If you’re short on time, finely chop them and add them directly to the batter. Their bright color also gives the rusks a lovely golden hue.
The Final Flourish: Lemon Zest & Walnuts
Lemon zest adds a bright, citrusy lift that cuts through the sweetness, while walnuts provide a satisfying crunch and a nutty depth. The zest’s oils release aromatic compounds that elevate the overall flavor profile. Walnuts, when toasted before adding, bring a toasted, buttery aroma that pairs wonderfully with the caramelized sugar. Together, they create a complex, layered taste that keeps the rusks interesting from the first bite to the last.
Everything's prepped? Good. Let's get into the real action...
The Method — Step by Step
- Preheat your oven to 325°F (160°C). Line a baking sheet with parchment paper and set aside. In a small bowl, whisk together the flour, baking powder, and salt; this ensures even distribution of leavening agents. This step is crucial—any clumps will lead to uneven rise. Keep the mixture in the dark while you prepare the wet ingredients.
- In a large mixing bowl, cream the softened butter and sugar together until light and fluffy, about 2–3 minutes. The goal is to incorporate air, giving the dough a tender crumb. Add the eggs one at a time, beating well after each addition to maintain the emulsion. Stir in the vanilla extract, which brings warmth and depth.
- Gradually fold in the dry ingredients, mixing until just combined. Avoid overmixing to keep the rusks tender. At this point, add the chopped apricots, walnuts, lemon zest, and cinnamon. The wet and dry ingredients should form a cohesive dough that holds together. If the dough feels too dry, add a tablespoon of milk to loosen it.
- Shape the dough into a log about 12 inches long and place it on the prepared baking sheet. Use a knife to cut the log into 1/2-inch thick slices, arranging them side by side on the sheet. The slices should be slightly overlapping to ensure even baking. This technique gives the rusks their classic shape.
- Bake at 325°F (160°C) for 20 minutes, or until the edges begin to turn golden. The internal temperature should reach 190°F (88°C). This first bake sets the structure without overbrowning the surface. Keep a close eye on the color to prevent burning.
- Increase the oven temperature to 375°F (190°C) and bake for an additional 10 minutes, until the rusks develop a deep golden crust. The higher heat caramelizes the sugar, creating that signature crunch. Watch the rusks closely; the moment they reach the perfect color is the moment to remove them from the oven.
- Let the rusks cool on a wire rack for 10 minutes. This cooling period allows the steam to escape, preventing the rusks from becoming soggy. Once slightly cooled, you can slice them further if you prefer smaller pieces.
- Store the rusks in an airtight container at room temperature for up to a week. For longer storage, freeze them in a zip‑lock bag; thaw at room temperature before serving. The rusks stay crisp and flavorful, making them a perfect grab‑and‑go snack.
- Serve them with a cup of tea or coffee, or enjoy them as a quick breakfast. Their sweet‑citrus profile pairs beautifully with a hot beverage. I’ve found they’re especially delightful when paired with a light yogurt parfait for a balanced treat.
That's it — you did it. But hold on, I've got a few more tricks that'll take this to another level...
Insider Tricks for Flawless Results
The Temperature Rule Nobody Follows
Many bakers bake rusks at a single high temperature, which can result in uneven browning. By starting at a lower temperature, you give the dough time to set, and the final high heat caramelizes the sugars without burning the exterior. This two‑stage approach is the secret to a consistent golden crust.
Why Your Nose Knows Best
The aroma of a rusks baking is a powerful indicator of progress. When you smell a sweet, buttery scent with hints of citrus, it’s a sign the sugar is caramelizing. If the scent becomes sharp or burnt, it’s time to lower the heat or remove them from the oven. Trust your nose—your brain will thank you later.
The 5-Minute Rest That Changes Everything
After the final bake, let the rusks rest for exactly five minutes on the baking sheet. This brief pause allows the steam to redistribute, making the rusks crispier and more cohesive. Skipping this step can leave them slightly soggy on the inside.
The Secret to Even Slices
Use a serrated knife or a bench scraper to cut the dough. A dull blade can crush the dough, creating uneven edges and affecting the final texture. A sharp, clean cut ensures each rusks slice is uniform, making them look as good as they taste.
The Final Glaze Trick
If you prefer a sweeter finish, whisk powdered sugar with a tablespoon of milk to create a thin glaze. Brush it over the rusks right before the second bake. This glaze adds a shiny, sweet crust that enhances the caramelization and keeps the rusks moist.
Creative Twists and Variations
This recipe is a playground. Here are some of my favorite ways to switch things up:
Tropical Twist
Swap the dried apricots for shredded coconut and add a handful of dried pineapple chunks. The coconut adds a chewy texture, while the pineapple brings a tangy sweetness that pairs wonderfully with the lemon zest.
Chocolate Lover’s Edition
Fold in 1/2 cup of dark chocolate chips and replace the lemon zest with orange zest. The chocolate provides a rich, bittersweet layer that contrasts the sweet nuts, creating a decadent treat.
Spiced Ginger Variation
Add 1 tsp ground ginger and 1/2 tsp ground cloves to the dry mix. Replace the walnuts with chopped pistachios. The warm spices give the rusks a comforting, aromatic profile perfect for fall.
Nut-Free Option
Omit the walnuts and add a handful of dried cranberries instead. The cranberries bring tartness that balances the sweetness, while the nut-free dough remains crisp and tender.
Almond Flour Upgrade
Replace half the all-purpose flour with almond flour for a gluten-free version. The almond flour adds a subtle nutty flavor and keeps the rusks moist.
Savory Surprise
Drop the sugar entirely and add 1 tsp smoked paprika. Use dried tomatoes instead of apricots. The result is a savory rusks that pair beautifully with cheese platters.
Storing and Bringing It Back to Life
Fridge Storage
Place the rusks in an airtight container and store at room temperature for up to 7 days. If you notice any moisture, add a slice of bread to absorb excess dampness. This keeps the rusks crisp and fresh.
Freezer Friendly
Pack the rusks in a zip‑lock bag, removing as much air as possible. Freeze for up to 3 months. When ready to eat, thaw at room temperature for 30 minutes. The rusks regain their crunch without losing flavor.
Best Reheating Method
To revive frozen rusks, preheat your oven to 350°F (175°C). Place the rusks on a baking sheet and bake for 8–10 minutes. For a quick refresh, microwave them for 15 seconds—just enough to soften the center while keeping the edges crisp.