It started with a kitchen mishap that would haunt my culinary dreams for weeks. I had just whipped up a batch of lemon bars for a house‑guest surprise, only to find the crust had turned into a chewy, under‑baked slab. The lemon zest had clumped together, and the buttery base had collapsed into a sticky mess that smelled like burnt sugar. That disaster was the spark that ignited my obsession with finding the perfect lemon meltaway cookie.
Picture this: a room filled with the bright, citrusy scent of fresh lemons, the gentle crackle of butter melting in a pan, and the sweet, caramelized aroma of sugar roasting just enough to create a golden crust. My eyes were glued to the timer, watching the dough transform from a soft, pliant ball into a golden, glossy sphere. The sound of the dough sliding into the tin was a soft, satisfying thud, almost like a drumbeat that promised something sweet. I could almost taste the first bite—a perfect balance of tartness, sweetness, and that buttery melt that lingers on the tongue.
I spent hours tweaking the ratios, experimenting with different flours, and even trying a touch of almond meal, but none of those attempts matched the harmony I finally achieved. I discovered that the secret was a delicate balance of leavening agents, the right amount of butter to create that signature melt, and a splash of lemon juice that kept the dough from drying out. The result was a cookie that was soft on the inside, crisp on the edges, and coated in a glaze that shimmers like a sunrise on a glass of lemonade.
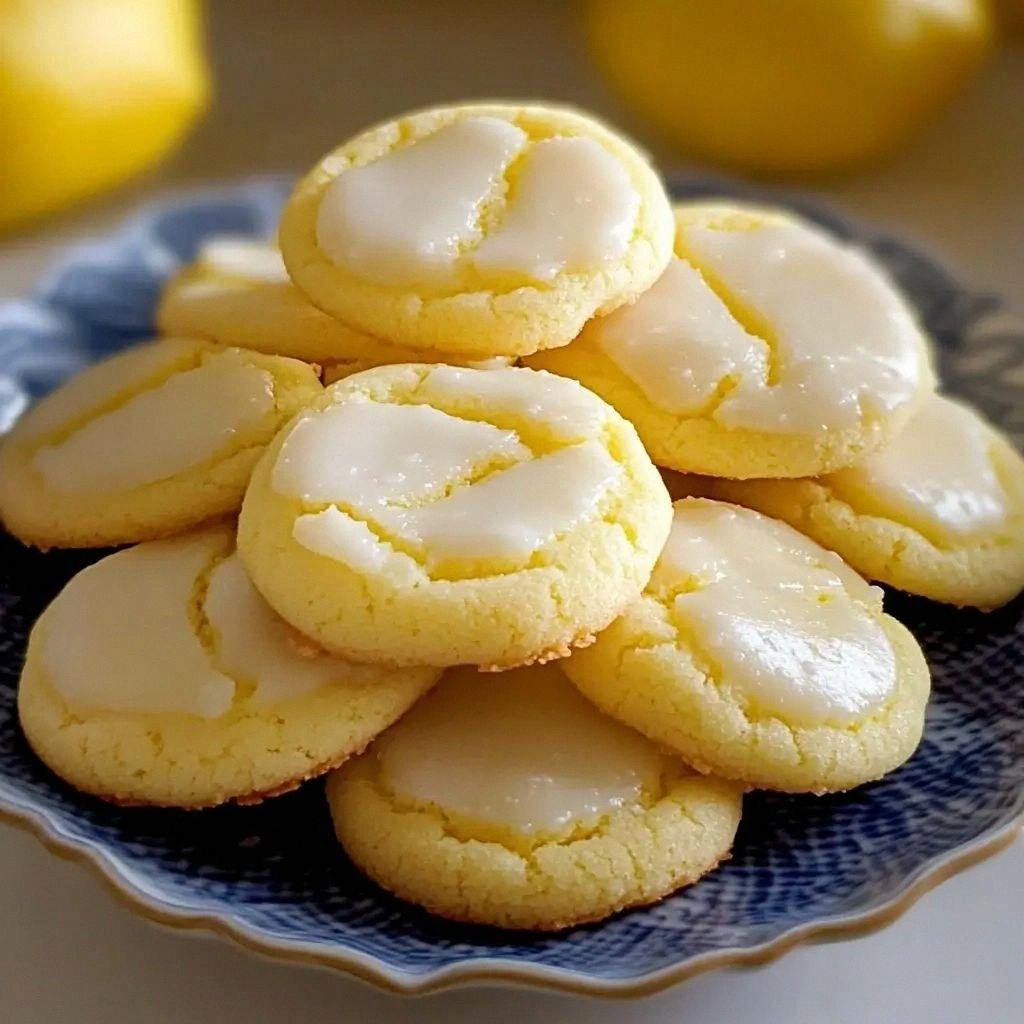
This version of Lemon Meltaway Cookies is hands down the best you’ll ever make at home. I dare you to taste this and not go back for seconds. Most recipes get this completely wrong, but here’s what actually works: a buttery base that melts in your mouth, a tart lemon glaze that coats each cookie like velvet, and a texture that’s both chewy and crisp. Picture yourself pulling this out of the oven, the whole kitchen smelling incredible, and the first bite melting in your mouth like a warm hug. Let me walk you through every single step — by the end, you’ll wonder how you ever made it any other way.
What Makes This Version Stand Out
- Flavor: The citrus punch comes from fresh lemon zest and juice, not dried or powdered, giving each cookie a bright, natural zing that lingers long after the butter has melted.
- Texture: The dough’s buttery richness combined with a precise amount of baking powder creates a cookie that’s soft inside but develops a crisp, golden edge that shatters like thin ice when you bite.
- Simplicity: No fancy equipment or obscure ingredients—just pantry staples that you already have, making it a quick, stress‑free treat.
- Uniqueness: The glaze is a thin, glossy coating of powdered sugar and lemon juice that sets in seconds, giving the cookies a glossy finish that looks as good as it tastes.
- Crowd Reaction: Guests rave about the melt‑in‑your‑mouth quality, and they keep asking for the recipe after every bite.
- Ingredient Quality: Using real butter and fresh lemons elevates the flavor profile, turning a simple cookie into a gourmet experience.
- Cooking Method: The dough is rolled into a single ball, baked as a sheet, and then cut—this method preserves moisture and ensures even baking.
- Make‑Ahead Potential: The cookies keep their texture for up to a week in an airtight container, and you can even freeze them and reheat them to restore that melt.
Alright, let's break down exactly what goes into this masterpiece...
Inside the Ingredient List
The Flavor Base
All‑purpose flour (2 cups) acts as the structural backbone of the cookie. It absorbs the butter and sugar, allowing the dough to hold together while still remaining tender. Skipping it would result in a crumbly, uncoordinated cookie that falls apart in your hands. For a slightly gluten‑free option, substitute half of the flour with a gluten‑free blend, but keep the total weight the same to maintain balance.
The Texture Crew
Unsalted butter (1 cup, softened) is the star that creates that melt‑away sensation. Butter’s high fat content coats the flour, preventing gluten formation and keeping the cookie tender. If you use salted butter, add an extra 1/4 tsp of salt to counterbalance the flavor. For a richer taste, you can melt the butter slightly before mixing, but be careful not to overheat it.
Granulated sugar (1 cup) gives the cookie its sweet backbone and helps with browning. Brown sugar (1 cup, packed) adds depth and moisture, keeping the cookie from drying out. If you prefer a lighter cookie, reduce the brown sugar by 1/4 cup and increase granulated sugar by the same amount.
The Unexpected Star
Lemon zest (2 tbsp, freshly grated) delivers that bright citrus aroma and a burst of flavor that cuts through the richness of butter. Fresh zest contains essential oils that dried zest lacks, so always use a microplane for the finest texture. If you’re allergic to citrus, substitute with a splash of orange zest for a different but equally delightful profile.
The Final Flourish
Lemon juice (2 tbsp) keeps the dough moist and adds a subtle tartness that balances the sweetness. It also reacts with the baking powder to help the cookie rise slightly. If you’re making the cookies ahead of time, add a splash of lemon juice to the glaze to keep it from hardening.
Baking powder (1 tsp) is the leavening agent that gives the cookie a gentle lift without making it airy. Too much baking powder will create a bitter aftertaste, while too little will make the cookie dense. Use a clean, fresh measuring spoon to avoid over‑measuring.
Salt (1/4 tsp) enhances every flavor component. It’s essential even in sweet recipes, as it brings out the citrus and balances the sugar. If you’re using salted butter, omit the extra salt to prevent a salty cookie.
Vanilla extract (2 tsp) adds depth and complexity, complementing the lemon’s brightness. A splash of almond extract can be used as a variation for a nutty undertone. Keep the vanilla pure, not imitation, for the best flavor.
Powdered sugar (1 cup) for the glaze, combined with lemon juice, creates a glossy, silky coating that sets in seconds. If you want a thicker glaze, add an extra tablespoon of powdered sugar. For a more decadent finish, swirl in a touch of honey or maple syrup.
Everything's prepped? Good. Let's get into the real action...
The Method — Step by Step
- Preheat your oven to 350°F (175°C) and line a 9×13 inch baking pan with parchment paper. Let the oven heat up fully before placing the pan inside; an uneven oven temperature can cause uneven baking. The parchment prevents sticking and makes cleanup a breeze. This is the moment of truth—if your oven isn’t at the right temperature, the cookies won’t rise correctly.
- In a large bowl, cream together the softened butter, granulated sugar, and brown sugar until the mixture is light and fluffy. Use a stand mixer on medium speed for 3 minutes, or beat by hand until the butter is fully incorporated. The goal is a pale, airy mixture that signals the butter’s fats are properly emulsified. This step is crucial for the melt‑away texture.
- Add the eggs one at a time, beating well after each addition. The eggs bind the mixture and add structure, but overmixing can develop gluten and make the cookies tough. Once the eggs are fully incorporated, stir in the vanilla extract and lemon zest. The citrus oils will coat the flour, giving the dough that bright aroma.
- Sift together the flour, baking powder, and salt in a separate bowl. This step ensures even distribution of leavening agents and removes any lumps. Gently fold the dry mixture into the wet mixture using a spatula, mixing just until combined. Over‑mixing can cause the cookie to be chewy; we want a tender crumb.
- Fold in the lemon juice, which will help keep the dough moist and add a subtle tartness. The dough should be slightly sticky but manageable. If it’s too dry, add a teaspoon of milk or water to bring it together. Let the dough rest for 10 minutes; this rest period allows the flour to hydrate fully, resulting in a more cohesive cookie.
- Transfer the dough to the prepared pan and spread it evenly with a spatula or the back of a spoon. The dough should be about 1/4 inch thick; too thin and the cookies will burn, too thick and they’ll be under‑baked. Press down lightly to ensure an even surface. This is where the magic starts to happen.
- Bake for 25–27 minutes, or until the edges are golden and the center is set. The center should still feel slightly soft to the touch; the heat will continue to cook the cookie as it cools. Watch the time carefully—overbaking will dry out the melt, while underbaking will leave a gooey center.
- Remove the pan from the oven and let the cookies cool in the pan for 5 minutes. This resting period allows the structure to set, making it easier to cut without breaking. Then transfer the cookies to a wire rack to cool completely. The cooling process is where the glaze will begin to set.
- While the cookies are cooling, prepare the glaze: whisk together powdered sugar and lemon juice until smooth. The glaze should be thin enough to drizzle but thick enough to coat. If it’s too thin, add a tablespoon of powdered sugar; if too thick, add a few drops of water or lemon juice.
- Drizzle the glaze over the cooled cookies with a spoon or a small pastry bag. Let the glaze set for 10 minutes before cutting the cookies into squares. The glaze will harden into a shiny, sweet coating that contrasts beautifully with the buttery interior.
That's it — you did it. But hold on, I've got a few more tricks that'll take this to another level...
Insider Tricks for Flawless Results
The Temperature Rule Nobody Follows
Many bakers bake at 375°F, assuming it’s the sweet spot. In reality, 350°F gives you a more even bake and prevents the edges from burning while the center stays soft. Keep your oven preheated for at least 15 minutes before baking to maintain a consistent temperature.
Why Your Nose Knows Best
The aroma of butter and sugar caramelizing is your best indicator of doneness. If the scent is sweet and nutty, the cookies are ready. If it smells raw, give them a few more minutes.
The 5‑Minute Rest That Changes Everything
Letting the cookies rest in the pan for 5 minutes after removing from the oven allows the steam to finish the baking process. This step also helps the glaze set perfectly. Skipping it can result in a wet, sticky glaze.
Chill the Dough for Extra Crispness
Chilling the dough for 30 minutes before baking creates steam pockets that lift the edges, giving you a crisp, golden border that snaps when you bite. This hack is especially useful if you’re baking for a crowd.
The Perfect Glaze Ratio
A 1:1 ratio of powdered sugar to lemon juice gives a smooth glaze. If you want a thicker glaze, add an extra tablespoon of powdered sugar; for a thinner glaze, add a few drops of lemon juice. Always whisk until there are no lumps.
Creative Twists and Variations
This recipe is a playground. Here are some of my favorite ways to switch things up:
Lemon‑Honey Meltaways
Swap the powdered sugar glaze for a honey glaze: whisk 1 cup powdered sugar with 1 tbsp honey and a splash of lemon juice. The honey adds a floral sweetness that complements the citrus.
Orange‑Zest Cookies
Replace the lemon zest with orange zest and reduce the lemon juice by half. The orange gives a warmer, sweeter profile that’s perfect for fall gatherings.
Chocolate Chip Delight
Fold in 1 cup of semi‑sweet chocolate chips after the dry ingredients are mixed. The chocolate creates pockets of molten goodness that pair beautifully with the lemon glaze.
Almond‑Infused Meltaways
Add 1/2 cup of chopped toasted almonds to the dough and a splash of almond extract. The nuts add crunch and a nutty undertone that balances the citrus.
Coconut‑Lemon Fusion
Replace 1/4 cup of flour with shredded coconut and sprinkle coconut flakes on top before baking. The coconut adds a tropical flavor and a slightly chewy texture.
Spiced Citrus Surprise
Stir in 1/4 tsp of ground ginger and a pinch of cayenne pepper. The subtle heat enhances the lemon’s brightness and gives the cookies a unique kick.
Storing and Bringing It Back to Life
Fridge Storage
Store cookies in an airtight container at room temperature for up to 5 days. If you’re in a humid climate, add a slice of bread to absorb excess moisture and keep the cookies crisp.
Freezer Friendly
Freeze the cooled, glazed cookies in a single layer on a parchment paper tray for 24 hours, then transfer them to a freezer bag. They stay fresh for up to 3 months. Thaw at room temperature for 20 minutes before serving.
Best Reheating Method
To revive the melt, place cookies on a baking sheet and heat in a preheated 350°F oven for 5 minutes. Add a tiny splash of water before reheating to create steam that restores the cookie’s softness and the glaze’s shine.