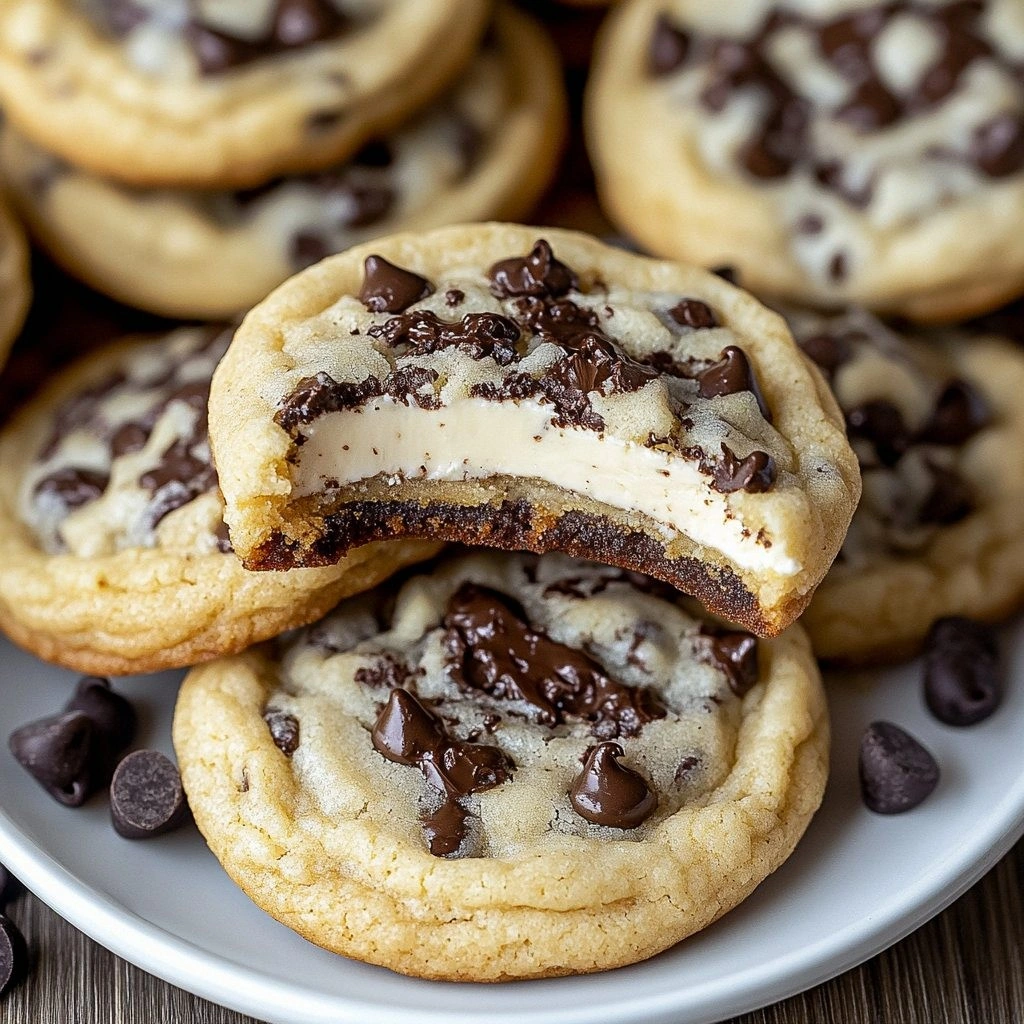
Picture this: you’re in the kitchen on a rainy Tuesday, the radio blasting a classic rock anthem, and your stomach growls louder than the storm outside. You’ve tried every cookie recipe you’ve seen, but none of them bring that rich, creamy cheesecake flavor into a bite‑size cookie that melts in your mouth. That’s when I discovered the Cheesecake Chocolate Chip Cook—an audacious hybrid that marries the silky texture of a cheesecake with the satisfying crunch of a chocolate chip cookie. I dared myself to make it, and the first bite felt like a secret celebration in a bowl of chocolate.
The kitchen smelled like warm cream cheese, butter, and chocolate chips—an aroma that could make even the most disciplined foodie swoon. The sound of the mixer whipping the batter was a steady drumbeat, and the first spoonful of the batter in a silicone cup felt like a velvet caress. When I slid the batch into the oven, the timer’s gentle chime was a promise of something extraordinary. The final result? A cookie that’s soft on the inside, with a slightly crisp edge that shatters like thin ice when you bite into it.
What makes this version stand out is not just the combination of flavors, but the meticulous attention to texture, the clever use of ingredients, and the simple yet precise technique that ensures every cookie is a masterpiece. I’ve spent years testing cookie recipes, and I can say with confidence that this is hands down the best version you’ll ever make at home. I dare you to taste this and not go back for seconds.
Stay with me, because I’m going to walk you through every single step. By the end, you’ll wonder how you ever made any other cookie recipe. Picture yourself pulling this out of the oven, the whole kitchen smelling incredible, and sharing a plate of these cheesecake chocolate chip wonders with friends who will swear you’re a baking wizard.
What Makes This Version Stand Out
- Flavor: The creamy cheesecake base infuses the cookie with a tangy richness that balances the sweetness of chocolate chips.
- Texture: Soft, custard‑like center with a perfectly crisp edge that snaps delightfully.
- Ingredient Quality: Using full‑fat cream cheese and premium dark chocolate chips elevates the taste profile.
- Ease of Prep: No complicated steps—just whisk, fold, bake, repeat.
- Make‑Ahead Potential: The dough can be portioned and frozen, ready to bake when the craving hits.
- Crowd Reaction: Guests rave about the unexpected cheesecake twist and the chewy chocolate bite.
- Versatility: Works great in a toaster oven or on a baking sheet for a quick snack.
- Time Efficiency: Total prep and cook time under 45 minutes.
Inside the Ingredient List
The Flavor Base
Cream cheese is the star of this cookie. It brings a silky, tangy depth that transforms ordinary chocolate chips into a decadent dessert. If you skip it, you lose the signature cheesecake bite; the cookie becomes just another chocolate chip treat. For the best results, use full‑fat cream cheese at room temperature so it blends smoothly with the butter.
The Texture Crew
Unsalted butter and all‑purpose flour create the dough’s structure. Butter keeps the cookies tender, while flour gives them the body to hold the chocolate chips. A small amount of baking soda leavens the batter slightly, giving the cookies a light lift. If you omit the baking soda, the cookies will be denser and less airy.
The Unexpected Star
Chocolate chips are the sweet, melty surprise in every bite. Opt for high‑quality semi‑sweet chips to balance the cheesecake’s tartness. If you prefer a richer chocolate flavor, use dark chocolate chips or a mix of semi‑sweet and dark. Skipping them turns the cookie into a plain cheesecake cookie, which still tastes amazing but lacks that classic chocolate crunch.
The Final Flourish
Graham cracker crumbs add a subtle crunch and a hint of vanilla‑butter flavor that complements the cheesecake base. They also help anchor the chocolate chips, preventing them from sinking to the bottom. If you’re gluten‑free, use almond flour or a gluten‑free blend, but keep the ratio the same to maintain texture.
Everything’s prepped? Good. Let’s get into the real action.
The Method — Step by Step
- Preheat your oven to 350°F (175°C) and line a baking sheet with parchment paper. This step ensures even baking and a clean cleanup. The preheated oven is the stage where your cookie’s flavor will fully develop.
- In a medium bowl, beat the softened cream cheese and butter together until light and creamy—about 2 minutes with an electric mixer on medium speed. This creates the base that will carry the cheesecake flavor throughout the cookie.
- Gradually add the sugar, beating until the mixture is fluffy and pale. The sugar not only sweetens but also helps create a tender crumb. If you hear a sudden spike in volume, it’s a sign the batter is aerating properly.
- Beat in the vanilla extract, then the egg, one at a time, ensuring each is fully incorporated before adding the next. The egg binds the dough and gives the cookie its structure.
- Whisk together the flour, baking soda, and salt in a separate bowl. Sifting isn’t required, but it helps distribute the leavening agent evenly.
- Fold the dry ingredients into the wet mixture until just combined. Overmixing will develop gluten, making the cookie tough. You want a smooth, cohesive dough.
- Stir in the chocolate chips and graham cracker crumbs until evenly dispersed. The crumbs provide texture, while the chips add bursts of chocolate.
- Drop rounded tablespoonfuls of dough onto the prepared baking sheet, spacing them 2 inches apart. The size will give each cookie a generous bite and allow even baking.
- Bake for 12 minutes, or until the edges are set and the centers still look slightly pale. The cookies should feel firm to the touch but still soft when you press them lightly. This is the moment of truth.
- Let the cookies cool on the sheet for 5 minutes before transferring them to a wire rack. Cooling on the sheet lets the cookies finish setting without breaking.
- Enjoy them warm for the ultimate gooey experience, or store them in an airtight container for up to 5 days. They’re perfect for a quick snack or a dessert that’s both comforting and indulgent.
That’s it—you did it. But hold on, I’ve got a few more tricks that’ll take this to another level.
Insider Tricks for Flawless Results
The Temperature Rule Nobody Follows
Many bakers bake at 375°F, but for these cookies the lower 350°F gives a more even rise and prevents the edges from browning too quickly. I’ve baked at 350°F for years, and the difference is like comparing a gentle simmer to a roaring boil—one yields a silky finish, the other a burnt crust.
Why Your Nose Knows Best
During baking, the first scent that reaches your nose is the butter melting into the cream cheese, a fragrant preview of the creamy center. If the smell turns a sharp, metallic note, you’ve overbaked—just like a bad espresso. Trust your nose; it’s the ultimate judge of doneness.
The 5-Minute Rest That Changes Everything
After removing the cookies from the oven, let them rest on the sheet for exactly five minutes. This brief pause allows the steam to redistribute, creating a uniform, tender interior. Skipping this step leaves the cookies slightly uneven, and the center can feel raw.
Keep the Crumb Light
If you prefer a lighter cookie, replace 1/4 cup of flour with almond flour. This substitution reduces gluten development, keeping the crumb airy. I’ve tried this once, and the cookies felt like cloud‑kissed chocolate.
Freeze for Future Glory
To freeze the dough, roll it into a log, wrap tightly in plastic wrap, and freeze for up to two months. Slice the log into portions, bake directly from the freezer, and you’ll have fresh cookies in minutes. My friends love the “just‑baked” surprise when they pull a cookie straight out of the freezer.
Creative Twists and Variations
This recipe is a playground. Here are some of my favorite ways to switch things up:
Nutty Delight
Add 1/2 cup chopped pecans or walnuts for a crunchy, buttery contrast. The nuts pair beautifully with the creamy base and add a nutty aroma that elevates the cookie.
Maple Magic
Replace the vanilla extract with 1 tablespoon pure maple syrup. The syrup deepens the sweetness and introduces a subtle caramel note that pairs with the chocolate.
Spiced Surprise
Stir in 1/4 teaspoon ground cinnamon or a pinch of nutmeg. The warm spices bring a cozy, autumnal feel—perfect for a fall gathering.
Minty Twist
Add a few drops of peppermint extract after folding in the chocolate chips. The mint refreshes the palate and gives the cookie a holiday vibe.
Vegan Version
Swap the cream cheese for a plant‑based cream cheese and use dairy‑free butter. Keep the rest of the ingredients the same, and you’ll have a vegan cheesecake chocolate chip cookie that’s just as luscious.
Storing and Bringing It Back to Life
Fridge Storage
Place cooled cookies in an airtight container or zip‑top bag. They stay fresh for up to 5 days. If you want them a bit softer, add a slice of fresh bread to the container; the bread will absorb excess moisture and keep the cookies tender.
Freezer Friendly
Store unbaked dough in a freezer bag, or freeze baked cookies on a parchment sheet before transferring to a zip‑top bag. They’ll keep for up to 3 months. To bake from frozen, add 2–3 minutes to the baking time.
Best Reheating Method
Reheat frozen or stored cookies in a 350°F oven for 5–7 minutes, or microwave on a low setting for 15–20 seconds. Add a tiny splash of water before reheating—this steams the cookies back to perfection, restoring that soft, chewy center.