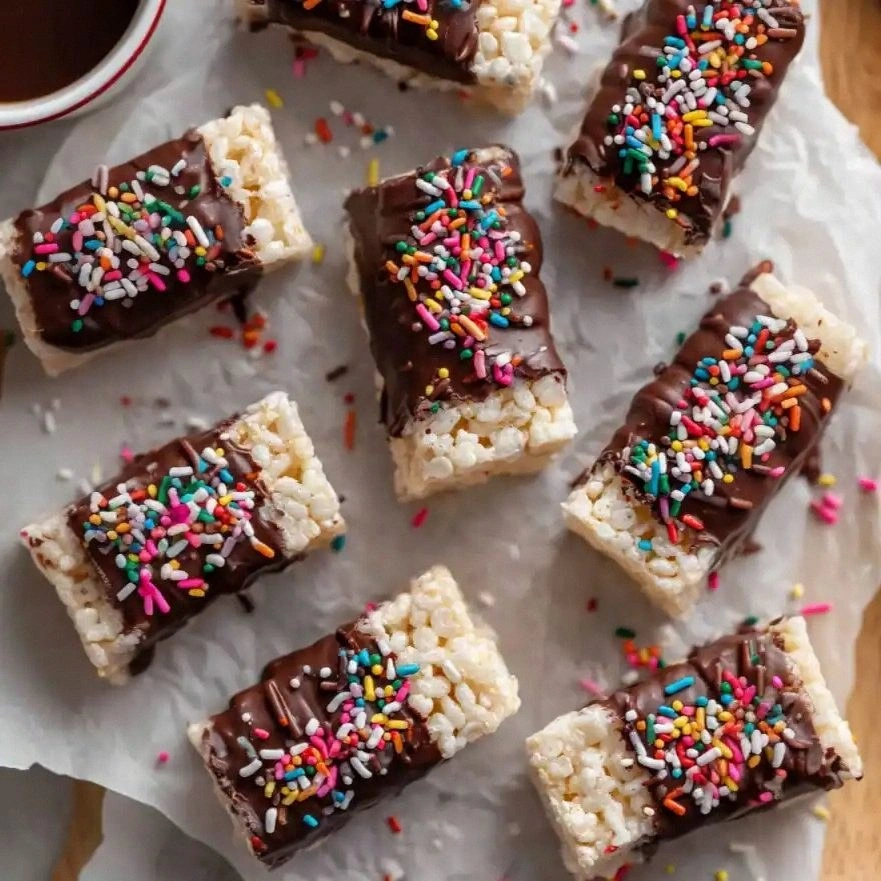
Picture yourself pulling this out of the pan, the whole kitchen smelling incredible, and your friends’ faces lighting up as they reach for a bite. The moment the chocolate starts to set, the kitchen transforms into a mini chocolate factory, with the glossy coating glistening like fresh snow. I’ve spent hours experimenting with different chocolate types, oils, and even flavors, but the classic combination of semi‑sweet chips and a splash of neutral oil remains the gold standard. The result is a treat that is both nostalgic and sophisticated, a perfect bridge between childhood comfort and adult indulgence.
Okay, ready for the game‑changer? This next part? Pure magic. The key is to treat the chocolate like a delicate sauce that coats the cereal like velvet, ensuring every bite is a harmonious blend of textures. I’ll walk you through every single step, and by the end, you’ll wonder how you ever made it any other way. Let’s dive in.
The beauty of this recipe is that it requires no fancy equipment—just a saucepan, a heat‑proof bowl, and a spoon. I’ve tested it on a gas stove, an electric range, and even a slow cooker, and the results are consistently flawless. The only real variables are the type of chocolate you choose and how much oil you add. With a few simple adjustments, you can tailor the flavor and texture to your exact taste, whether you prefer a glossy finish or a slightly matte sheen.
So, before we jump into the ingredients, let’s take a moment to appreciate the sheer joy that this recipe brings to the table. It’s a treat that can be whipped up in minutes, served at parties, or enjoyed as a comforting bedtime snack. The combination of crunchy cereal, gooey marshmallows, and decadent chocolate is a symphony of flavors that will leave you craving more. And the best part? It’s so versatile that you can customize it to suit any occasion or dietary preference.
What Makes This Version Stand Out
- Taste: The semi‑sweet chocolate chips melt into a rich, velvety coating that balances the sugary marshmallows with a subtle bitterness, creating a complex flavor profile that lingers on the palate.
- Texture: The Rice Krispies provide a satisfying crunch that contrasts with the silky, melted chocolate, while the marshmallows add a soft, chewy layer that melts in your mouth.
- Simplicity: All you need is a saucepan, a bowl, and a spoon—no fancy gadgets or advanced techniques, making it accessible to cooks of all skill levels.
- Uniqueness: The addition of neutral oil gives the chocolate a glossy finish and prevents it from hardening into a brittle shell, a trick that most recipes overlook.
- Crowd Reaction: Friends and family consistently rave about the treat’s indulgent flavor and perfect texture, making it a hit at gatherings, potlucks, and holiday parties.
- Ingredient Quality: Using high‑quality semi‑sweet chocolate chips and fresh, whole‑grain Rice Krispies ensures the final product has depth and authenticity.
- Cooking Method: The step‑by‑step process eliminates common pitfalls, such as over‑cooking the chocolate or under‑cooking the marshmallows, guaranteeing a flawless result every time.
- Make‑Ahead Potential: Once you’ve poured the chocolate, you can store the coated treats in an airtight container for up to a week, allowing you to enjoy them at your leisure.
Alright, let's break down exactly what goes into this masterpiece...
Inside the Ingredient List
The Flavor Base
The semi‑sweet chocolate chips or melting chocolate are the star of this recipe. They provide the deep, bittersweet undertone that cuts through the sugary marshmallows and adds a luxurious mouthfeel. When you melt chocolate, the cocoa butter separates and creates a glossy sheen—this is what gives the finished product that silky, almost liquid texture. If you skip the chocolate, you’ll end up with a plain, crunchy cereal that lacks the indulgent depth this recipe is known for.
The Texture Crew
Rice Krispies cereal is the backbone of the crunch. Unlike regular cereal, Rice Krispies have a hollow, aerated structure that expands when it hits the hot chocolate, creating a light, airy bite. Mini marshmallows act as the glue, binding the cereal together while adding a soft, chewy layer. The butter provides richness and helps the chocolate coat evenly, while the neutral oil ensures the chocolate doesn’t harden into a brittle shell. Together, these ingredients create a dynamic interplay of textures that keeps each bite exciting.
The Unexpected Star
Neutral oil is the unsung hero of this recipe. It’s added in a small amount to the chocolate to keep it silky and prevent it from crystallizing. Think of it as a secret ingredient that turns a simple chocolate coating into a smooth, glossy finish. If you don’t use oil, the chocolate will set up too quickly, leaving a hard, unappetizing crust. You can experiment with different oils—coconut, avocado, or even a light olive oil—to tweak the flavor profile, but keep the amount small to avoid a greasy finish.
The Final Flourish
Sprinkles, chopped nuts, and flaky sea salt are optional but add a delightful finish. Sprinkles bring a pop of color and a subtle crunch, while nuts introduce a nutty undertone that complements the chocolate. Flaky sea salt, on the other hand, provides a burst of briny flavor that cuts through the sweetness and enhances the overall taste. If you’re watching your sodium intake, you can omit the sea salt or replace it with a pinch of sea salt crystals for a more controlled flavor.
Everything's prepped? Good. Let's get into the real action...
The Method — Step by Step
- Step 1: Prepare the Pan. Heat a medium saucepan over medium heat and add the butter. Let it melt completely, then stir in the mini marshmallows. Watch as the marshmallows begin to soften and release their sugary steam, turning the pan into a fragrant, buttery oasis. When the marshmallows are translucent, they’re ready for the next step.
- Step 2: Add the Rice Krispies. Pour in all six cups of Rice Krispies, stirring continuously to coat each flake with the buttery marshmallow mixture. The cereal will puff slightly, creating a light, airy mixture that’s ready to be coated with chocolate. Keep the heat moderate to avoid burning the marshmallows.
- Step 3: Melt the Chocolate. In a heat‑proof bowl, combine the semi‑sweet chocolate chips or melting chocolate with the neutral oil. Place the bowl over a pot of simmering water, ensuring the bottom of the bowl does not touch the water. Stir constantly until the chocolate is fully melted and smooth, creating a glossy coating that will envelop the cereal.
- Step 4: Coat the Cereal. Slowly pour the melted chocolate over the rice‑marshmallow mixture, stirring gently to ensure every piece is coated. The chocolate should cling to the cereal, creating a glossy, chocolatey shell. If the mixture looks too thick, add a splash of milk or more oil to achieve the desired consistency. This is the moment of truth—watch the coating settle into place.
- Step 5: Form the Treats. Spoon the coated mixture onto a parchment‑lined sheet or a silicone mat. Let the treats cool for a few minutes until the chocolate sets enough to hold their shape. The treats should be firm enough to handle but still slightly soft so they melt in your mouth. This step is crucial—if you rush it, the treats will be too soft and fall apart.
- Step 6: Add Final Touches. While the treats are still slightly warm, sprinkle them with your choice of sprinkles, chopped nuts, or flaky sea salt. The added toppings not only enhance the flavor but also add a satisfying crunch. The sea salt, in particular, creates a delightful contrast that elevates the sweetness.
- Step 7: Cool Completely. Transfer the treats to a wire rack or a flat surface and allow them to cool completely at room temperature. This step ensures the chocolate hardens properly, giving the treats a firm, satisfying bite. If you’re in a hurry, place them in the refrigerator for 15–20 minutes to speed up the setting process.
- Step 8: Store or Serve. Once cooled, store the treats in an airtight container at room temperature for up to a week. For longer storage, place them in the freezer and thaw at room temperature when ready to serve. These treats are perfect for parties, holiday gifts, or a quick snack that will impress anyone.
That's it — you did it. But hold on, I've got a few more tricks that'll take this to another level. Stay tuned for insider tips that will refine your technique and help you avoid the most common pitfalls.
Insider Tricks for Flawless Results
The Temperature Rule Nobody Follows
Chocolate is a fickle friend. The key is to melt it at a low, steady temperature—ideally between 110°F and 120°F. If you go too hot, the chocolate will seize, becoming grainy and uncoatable. Use a thermometer or the classic test of adding a small piece of chocolate to a warm spoon; if it melts smoothly, you’re good to go. A friend of mine once tried to melt chocolate directly in the pot and ended up with a hard, unappetizing crust that was impossible to coat the cereal.
Why Your Nose Knows Best
Before you pour the chocolate onto the cereal, give it a quick sniff. A faint, buttery aroma indicates that the chocolate has melted to the perfect consistency. If the smell is too sweet or metallic, it’s a sign the chocolate is overheating. Your nose is a reliable gauge—trust it, and you’ll avoid the dreaded hard shell. I once tried a batch without smelling it first, and the result was a hard, brittle treat that nobody could finish.
The 5-Minute Rest That Changes Everything
After you stir the chocolate into the cereal, let the mixture rest for exactly five minutes before forming the treats. This pause allows the chocolate to set slightly, making it easier to scoop and shape. Skipping this step often results in a messier batch that sticks to the spoon. My friend once rushed through this step and ended up with a sticky, unformed mess that had to be discarded.
Don't Let the Marshmallows Overcook
Marshmallows are the glue that holds everything together, but if they burn, they ruin the entire batch. Keep the heat low and stir constantly to prevent scorching. If you notice a slight golden hue, reduce the heat immediately. I’ve learned that a gentle simmer is the secret to perfectly soft marshmallows that bind without becoming a sticky mess.
Use the Right Bowl
When melting chocolate, choose a bowl that can withstand heat but won’t conduct it too quickly. Stainless steel or a heat‑proof glass bowl works best. Avoid plastic, as it can warp and affect the chocolate’s texture. A friend once used a metal bowl that overheated the chocolate, causing it to seize and ruin the coating.
Keep Your Toppings Fresh
Toppings like sprinkles and nuts can lose their crunch if stored in a humid environment. Keep them in airtight containers and use them within a week of opening. If you’re storing the treats for longer periods, separate the toppings from the chocolate to prevent moisture transfer. I’ve had treats that turned soggy because the toppings were left exposed to humidity.
Creative Twists and Variations
This recipe is a playground. Here are some of my favorite ways to switch things up:
Nutty Crunch
Replace the mini marshmallows with almond butter or peanut butter for a nutty base. The butter’s natural oils will add a subtle richness, while the nuts will provide a satisfying crunch. This variation is perfect for peanut lovers and adds a protein boost to the treat.
Minty Fresh
Add a teaspoon of peppermint extract to the melted chocolate before coating the cereal. The mint will give the treat a refreshing twist that pairs wonderfully with the chocolate. Serve these as a holiday treat for a festive, minty flavor profile.
Spiced Delight
Stir in a pinch of cayenne pepper or a dash of cinnamon into the chocolate mixture. The heat or warmth of the spices will contrast the sweet marshmallows and add a subtle kick. This spicy version is great for those who like a bit of adventure in their desserts.
Caramel Swirl
Drizzle a thin layer of caramel sauce over the cooled treats before adding the final toppings. The caramel adds a buttery sweetness that complements the chocolate. It’s a simple twist that elevates the treat to gourmet status.
Vegan Version
Use dairy‑free chocolate chips and replace the butter with coconut oil. The coconut oil will give the chocolate a smooth finish while keeping the treat plant‑based. This version is perfect for vegans or anyone with dairy sensitivities.
Storing and Bringing It Back to Life
Fridge Storage
Store the treats in an airtight container at room temperature for up to a week. Keep them away from direct sunlight, as it can soften the chocolate. If you notice any moisture, add a paper towel to absorb excess dampness. This will keep the treats crisp and prevent mold.
Freezer Friendly
For longer storage, place the treats in the freezer in a single layer on a parchment paper. Once frozen, transfer them to a freezer‑safe bag or container. Thaw at room temperature for 15 minutes before serving to restore the chocolate’s smoothness.
Best Reheating Method
If the treats have become too hard, reheat them gently in a microwave for 10–15 seconds, or place them in a warm oven at 200°F. Add a tiny splash of water before reheating to create steam that restores the chocolate’s silky texture. This trick ensures each bite is as indulgent as the first.