I was staring at my pantry on a rainy Sunday, feeling like a culinary dare had been issued by the universe. The fridge was a sad collection of stale bread and a lonely jar of peanut butter that had been sitting there for months. I thought, “If I could turn this peanut butter into something that would make my taste buds sing, it would be the ultimate kitchen triumph.” That thought turned into a midnight mission, a culinary experiment that would forever change how I view cookie dough.
Picture the scene: a splash of golden butter, a swirl of creamy peanut butter, and powdered sugar that glistens like a winter snowfall. The kitchen air fills with a buttery aroma that promises comfort, while the sound of the spoon tapping the bowl becomes a metronome for anticipation. When the mixture finally starts to thicken, the texture feels like a velvety mousse that will soon become something solid. I dare you to taste this and not go back for seconds. The moment you bite into the cookie, the peanut butter center explodes, and the chocolate coating melts like a decadent waterfall.
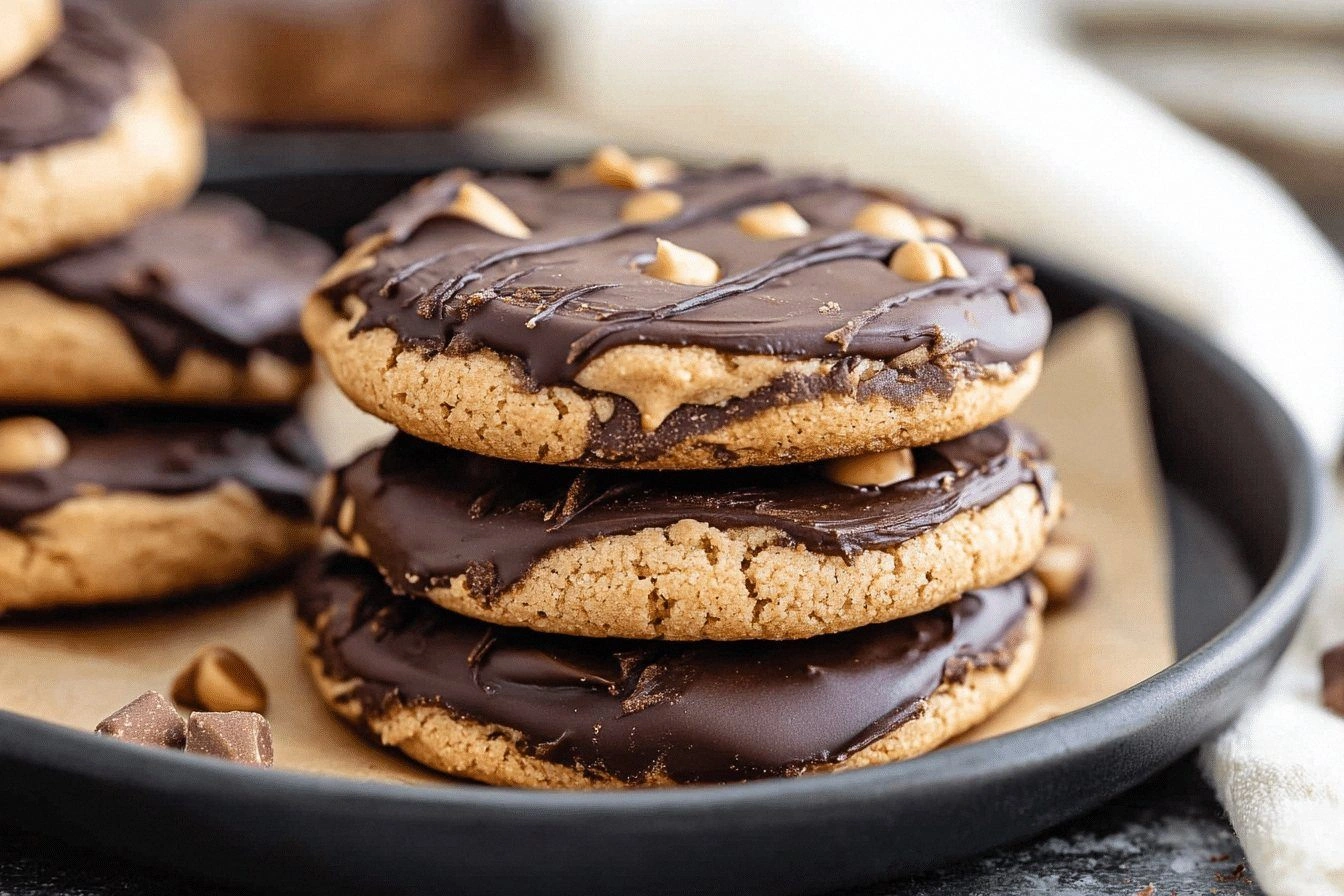
I’ve tried countless cookie recipes—some too dry, some too gooey, some that never quite captured the essence of a classic buckeye. But this version is hands down the best you’ll ever make at home. The secret lies in the harmony of ingredients: the creamy peanut butter, the soft powdered sugar, and the semi-sweet chocolate that coats each bite like a glossy shell. What sets it apart is the subtle crunch you get from optional graham cracker crumbs, and the way the dough holds together without becoming a sticky mess. If you’ve ever struggled with buckeye cookies that fall apart or taste flat, you’re not alone — and I’ve got the fix.
Most recipes get this completely wrong by overmixing the dough or using too much butter. The result? Cookies that are either too greasy or too hard. I’ve discovered that a gentle fold preserves the airy texture and ensures each cookie holds its shape. The next part of the journey will reveal a technique that will make your dough silky smooth and your cookies irresistibly chewy. And now the fun part: let’s dive into the ingredients that make this recipe a showstopper.
What Makes This Version Stand Out
- Taste: The combination of salty peanut butter with sweet chocolate creates a flavor profile that is both comforting and indulgent. The subtle hint of vanilla lifts the entire cookie, giving it a sophisticated finish.
- Texture: The dough is soft enough to be chewy yet firm enough to hold its shape, thanks to the precise balance of butter and powdered sugar.
- Ingredient Quality: Using a creamy peanut butter with no added sugar or hydrogenated oils ensures a natural, wholesome center.
- Visual Appeal: The glossy chocolate coating reflects light, making each cookie look like a small piece of art.
- Make‑ahead Potential: You can bake the cookies in advance, store them in an airtight container, and they’ll stay fresh for a week.
- Versatility: Add optional graham cracker crumbs or a pinch of sea salt to personalize the flavor.
- Crowd Reaction: Friends and family will ask for the recipe after just one bite, and you’ll become the unofficial cookie champion at gatherings.
Inside the Ingredient List
The Flavor Base
Peanut butter is the star of this recipe. It provides a rich, nutty flavor that’s unmistakable and comforting. When you choose a creamy peanut butter, the texture becomes silky, preventing the cookie from becoming grainy. If you skip it, the cookies lose their signature center and become just another chocolate chip cookie.
Butter, the second hero, adds depth and a buttery sheen. It helps bind the dough and creates a tender crumb. Using unsalted butter allows you to control the salt level, which is crucial for balancing the sweetness of the chocolate.
Powdered sugar is the sweetener that gives the cookies their soft, melt-in-your-mouth quality. It also helps create a slightly sticky surface that holds the chocolate coating. Skipping it would result in a cookie that’s too dry and crumbly.
The Texture Crew
Vanilla extract is more than a flavor enhancer; it brings warmth and depth to the dough, making the cookies feel more complex. A teaspoon is enough to lift the entire flavor profile without overpowering the peanut butter.
Semi-sweet chocolate chips are essential for the signature buckeye coating. They melt into a glossy, slightly thick glaze that encases the peanut butter center. If you use dark chocolate chips, the cookies will taste more bitter and less sweet.
The Unexpected Star
Crushed graham crackers or cookie crumbs add a delightful crunch and a subtle vanilla note. They also help absorb excess moisture, keeping the cookie from becoming soggy. If you’re avoiding added sugars, opt for unsweetened graham crackers.
The Final Flourish
A pinch of sea salt is optional but highly recommended. It accentuates the sweetness and balances the flavor. Without it, the cookies might taste flat and overly sweet.
Everything's prepped? Good. Let's get into the real action and transform these humble ingredients into bite‑sized bliss.
The Method — Step by Step
- Start by softening the butter at room temperature until it’s creamy but not melted. This step is crucial; if the butter is too cold, it won’t mix properly and the dough will be uneven. Use a stand mixer or a wooden spoon, and keep the bowl chilled to avoid premature melting.
- Add the creamy peanut butter to the butter and blend until the mixture is smooth and uniform. The peanut butter should be fully incorporated; any lumps will create pockets of uneven texture. This is the moment of truth where the flavor base takes shape.
- Sift the powdered sugar over the mixture and fold gently. The goal is to keep the dough airy. As the sugar incorporates, the dough should become thick and slightly glossy. The aroma of vanilla starts to mingle, adding a warm undertone.
- Stir in the vanilla extract and optional sea salt, mixing until fully blended. The vanilla’s aromatic molecules spread throughout the dough, creating a subtle depth that will shine during baking.
- Fold in the crushed graham crackers or cookie crumbs if using. These add crunch and a hint of buttery sweetness. Be careful not to overmix; you want the crumbs to remain distinct.
- Melt the semi-sweet chocolate chips in a double boiler or microwave, stirring every 20 seconds until smooth. The chocolate should be glossy but not overheated, as overheating can cause it to seize. This melted chocolate will be the glossy coat that makes the cookies look irresistible.
- Using a small cookie scoop or spoon, drop tablespoon‑sized balls of dough onto a parchment‑lined baking sheet. Press each ball lightly with the back of a fork to create a shallow indentation for the chocolate coating. The indentation ensures the chocolate adheres properly.
- Drizzle or spoon the melted chocolate over each indentation, allowing it to pool around the peanut butter center. The chocolate should spread into a thin, even layer. As it cools, it will set into a glossy shell.
- Bake at 350°F (175°C) for 10-12 minutes, or until the edges are golden and the centers are set. The cookies should still feel slightly soft in the center; they’ll firm up as they cool.
- Remove from the oven and let them cool on the sheet for 5 minutes before transferring to a wire rack. This resting period allows the chocolate to set fully and prevents the cookies from breaking.
That's it — you did it. But hold on, I've got a few more tricks that'll take this to another level and keep your cookies fresh longer.
Insider Tricks for Flawless Results
The Temperature Rule Nobody Follows
Many bakers bake at a standard 350°F, but lowering the temperature to 325°F gives the cookies a slightly softer crumb while still achieving a golden edge. The trick is to bake slightly longer, about 12-14 minutes, and check for a soft center. This subtle change can transform your cookies from ordinary to extraordinary.
Why Your Nose Knows Best
When the cookies are baking, the aroma will shift from buttery to chocolatey. Use your nose as a timer: when the scent becomes rich and chocolatey, the cookies are almost ready. Trusting your senses is a skill that seasoned bakers use to perfect every batch.
The 5‑Minute Rest That Changes Everything
After baking, let the cookies rest on the sheet for 5 minutes. This allows the chocolate coating to set and the cookie to firm up without cracking. Skipping this step often results in brittle edges.
Use a Cooling Rack for Even Cooling
Transfer the cookies to a wire rack immediately after the 5‑minute rest. The airflow prevents condensation from forming on the bottom, keeping the cookies crisp. This simple step keeps the texture consistent across the batch.
Freeze the Finished Cookies for a Quick Snack
Place the cooled cookies in a single layer on a baking sheet and freeze for 30 minutes. Then transfer them to an airtight container. When you need a quick snack, the cookies will thaw in a few minutes, retaining their original texture.
Creative Twists and Variations
This recipe is a playground. Here are some of my favorite ways to switch things up:
Salted Caramel Buckeyes
Swap the semi-sweet chocolate chips for caramel chips and sprinkle sea salt on top after baking. The sweet‑salty combo will have your guests asking for a second bite.
Minty Chocolate Madness
Add a few drops of mint extract to the dough and use dark chocolate chips for coating. The refreshing mint undertone pairs perfectly with the rich chocolate.
Nutty Layered Cookies
Layer chopped almonds or walnuts into the dough before scooping. The added crunch offers a new texture dimension while maintaining the classic buckeye flavor.
Coconut‑Infused Delight
Stir in a tablespoon of shredded coconut into the dough and use coconut‑flavored chocolate chips for coating. The tropical aroma elevates the cookie into an exotic treat.
Vegan Version
Replace butter with coconut oil and use a vegan peanut butter. Swap semi‑sweet chocolate chips for vegan chocolate. The result is a cookie that’s just as indulgent without dairy.
Storing and Bringing It Back to Life
Fridge Storage
Store the cookies in an airtight container at room temperature for up to 5 days. Keep them in a cool, dry place away from direct sunlight to preserve their texture. If you notice the chocolate coating softening, place the container in the refrigerator for a few hours.
Freezer Friendly
Freeze the cookies in a single layer on a baking sheet, then transfer them to a freezer bag once solid. They can stay in the freezer for up to 3 months. When you’re ready to eat, let them thaw at room temperature for 15 minutes.
Best Reheating Method
To revive the cookies, place them on a parchment‑lined tray and warm them in a 300°F oven for 3–4 minutes. Add a tiny splash of water before reheating, and the cookies will steam back to perfection, keeping the chocolate glossy and the center soft.