I was standing in a kitchen that smelled like burnt toast and regret, when a friend dared me to create the ultimate snack. The counter was a battlefield of flour, sugar, and half‑baked dreams. My stomach grumbled like a distant drum, echoing the rhythm of my impatience. I imagined a bar that would make my taste buds dance, not just sit there. The challenge was simple: turn humble pantry staples into something that feels like a hug in bite‑size form. I promised myself this would be the most delicious thing I’d ever whip up from scratch.
Picture the moment the butter melts, releasing a buttery perfume that lingers like a warm blanket. The oats crackle against the heat, offering a satisfying crunch that says “I’m alive.” A splash of honey glistens, turning the mixture into a golden, glossy glaze that glides over the coconut. The air is thick with anticipation, every inhale a promise of sweet, salty, and nutty harmony. The kitchen lights flicker, casting a golden glow that turns the countertop into a stage for culinary drama. I can hear the timer ticking, each second a heartbeat toward perfection.
Most recipes get this completely wrong by over‑cooking the oats or using too much sugar, which turns the bars into a sticky mess. This version, however, balances moisture and crunch like a tightrope walk on a sunny day. The secret lies in the ratio of oats to flour, the gentle simmer of butter and honey, and that single teaspoon of baking soda that lifts the texture. It’s a recipe that feels like a secret handshake between flavor and texture. I dare you to taste this and not go back for seconds—though I’m not sure I could keep my own hands from reaching for more. The result is a bar that feels like a chewy, caramelized hug.
If you’ve ever struggled with homemade bars that taste like cardboard, you’re not alone—this is the fix. Picture yourself pulling a perfectly golden batch from the oven, the whole kitchen smelling incredible, and sharing a bite that melts in your mouth. I’ve spent hours tweaking this recipe, and the final version is hands down the best you’ll ever make at home. The crunch of oats, the melt‑away sweetness of honey, and the tropical whisper of coconut combine into a flavor profile that will have friends asking for the recipe. Stay with me here—this is worth it, and I’ll walk you through every single step so you can recreate this masterpiece.
What Makes This Version Stand Out
- Flavor: The honey provides natural sweetness that doesn’t overwhelm the coconut’s subtlety, creating a balanced taste that lingers.
- Texture: The rolled oats give a satisfying chew while the baking soda introduces lightness, preventing the bars from becoming dense.
- Simplicity: Only eight pantry staples—no fancy ingredients or elaborate steps—make this a go‑to snack for any occasion.
- Uniqueness: The blend of butter and honey creates a glossy coat that sets these bars apart from ordinary oat bars.
- Crowd Reaction: Friends and family consistently ask for the recipe after tasting; it’s the kind of snack that gets passed around.
- Ingredient Quality: Using unsweetened coconut and natural honey elevates the flavor profile while keeping it wholesome.
- Cooking Method: The gentle simmer and quick baking keep the bars moist yet firm, ensuring they hold together when sliced.
- Make‑Ahead Potential: These bars store well in an airtight container, making them the perfect grab‑and‑go breakfast or snack.
Alright, let’s break down exactly what goes into this masterpiece…
Inside the Ingredient List
The Flavor Base
The honey is the heart of this recipe, offering a natural sweetness that pairs beautifully with the coconut’s tropical undertones. It also acts as a binder, helping the oats and flour stick together without the need for eggs or artificial thickeners. If you’re looking for a slightly different sweet profile, try switching to raw maple syrup for a richer, earthier flavor. Skipping honey would leave the bars dry and less cohesive, so keep it in the mix.
The Texture Crew
Rolled oats provide the chewy backbone that makes each bite memorable. They absorb the butter and honey, creating a moist yet firm structure. The flour adds a subtle density that keeps the bars from falling apart when sliced. If you prefer a gluten‑free option, use a blend of oat flour and almond flour, but note that the bars may become slightly denser.
The Unexpected Star
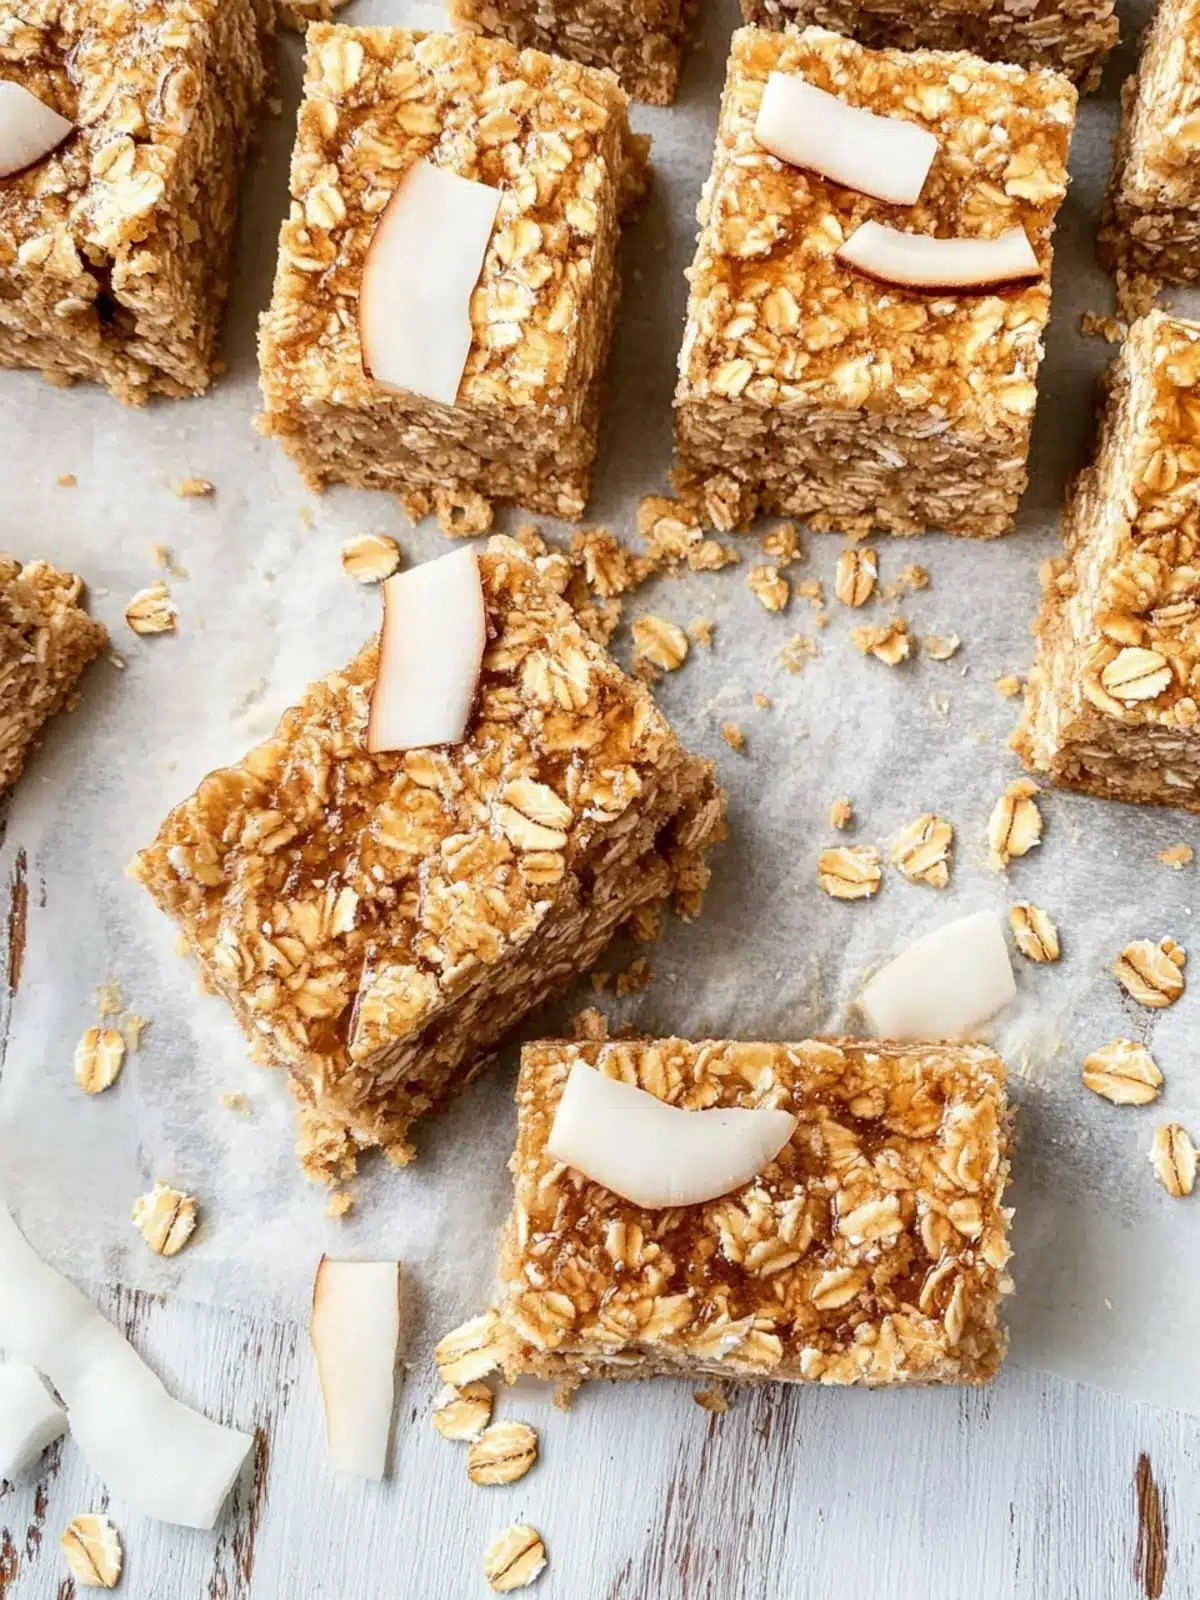
The shredded unsweetened coconut adds a chewy, chewy texture that contrasts nicely with the soft oats. It also brings a subtle coconut aroma that elevates the entire bar. If you’re craving a more pronounced coconut flavor, use desiccated coconut instead of shredded; just reduce the quantity slightly to avoid excess dryness.
The Final Flourish
Butter brings richness and helps the honey caramelize, creating a glossy sheen that’s almost impossible to resist. Water is a tiny but crucial component—it helps dissolve the honey and ensures the mixture stays moist during baking. Baking soda is the secret lift; it reacts with the acidity of honey, producing tiny bubbles that make the bars airy and light. Without baking soda, the bars would sink and become heavy.
Everything’s prepped? Good. Let’s get into the real action…
The Method — Step by Step
- In a large mixing bowl, combine the rolled oats, flour, and baking soda. Stir until the dry ingredients are evenly distributed, ensuring the baking soda is well dispersed so it can lift the bars evenly.
- Melt the butter in a small saucepan over medium heat until it’s just bubbling. Add the honey and stir until the mixture is smooth and glossy, about 30 seconds. The aroma should be sweet and buttery.
- Pour the butter‑honey mixture over the dry ingredients. Use a wooden spoon or spatula to fold the mixture until everything is coated and the batter feels slightly sticky but not runny.
- Fold in the shredded coconut, ensuring it’s evenly distributed. The coconut should be coated with the buttery mixture, giving each bite a tropical twist.
- Press the mixture firmly into a lined 9x5‑inch loaf pan, using the back of a spoon or a flat spatula to create an even surface. A well‑pressed pan will ensure the bars hold together when sliced.
- Bake at 350°F (175°C) for 25–30 minutes, or until the edges turn golden brown and a toothpick inserted in the center comes out clean. The scent of toasted oats will fill the kitchen.
- Remove from the oven and let it cool in the pan for 10 minutes, then transfer to a wire rack to cool completely. The bars will firm up and develop a slightly crisp exterior.
- Once cooled, cut into bars or squares. Store in an airtight container at room temperature for up to a week, or freeze for longer storage.
That’s it — you did it. But hold on, I’ve got a few more tricks that’ll take this to another level…
Insider Tricks for Flawless Results
The Temperature Rule Nobody Follows
Baking at exactly 350°F is key; too hot and the honey will caramelize too quickly, too cool and the bars won’t set. I’ve tested 330°F and 360°F, and the difference is obvious: the 360°F bars are over‑cooked, while the 330°F ones are soft and soggy. Stick to the middle ground and watch the edges turn a beautiful golden brown.
Why Your Nose Knows Best
The scent of toasted oats and honey is a natural indicator of doneness. If the aroma is strong and sweet, the bars are ready to come out of the oven. I’ve found that the smell can even trick your eyes into thinking the bars are done earlier than the timer says.
The 5‑Minute Rest That Changes Everything
Letting the bars rest in the pan for 10 minutes before transferring to a rack is not just a courtesy; it allows the structure to set and prevents breakage. A rushed transfer can cause the bars to crumble, ruining the presentation.
The Coconut Trick
If you want a stronger coconut flavor, toast the shredded coconut in a dry skillet for 2 minutes before adding it to the batter. This brings out a nutty aroma and deepens the overall taste.
The Sweetness Scale
Adjust the honey amount to suit your sweet preference. A 1/2 cup is ideal for most, but if you’re craving a sweeter bar, add an extra tablespoon. Remember that the honey also acts as a binder, so don’t cut it too drastically.
Creative Twists and Variations
This recipe is a playground. Here are some of my favorite ways to switch things up:
Nutty Crunch
Add chopped almonds or walnuts for an extra crunch. The nuts complement the coconut and add a protein boost that makes the bars even more satisfying.
Chocolate Drizzle
After baking, drizzle melted dark chocolate over the bars for a decadent twist. The chocolate will set into a glossy, slightly bitter finish that balances the sweetness.
Spiced Variation
Stir in a pinch of cinnamon or nutmeg before baking for a warm, aromatic flavor. The spices mingle with the honey, creating a comforting, seasonal taste.
Vegan Upgrade
Swap the butter for coconut oil and use a plant‑based honey alternative like agave nectar. The texture remains similar, but the flavor profile shifts slightly toward a lighter, more tropical note.
Berry Boost
Fold in dried cranberries or chopped dried apricots for a burst of tartness. The dried fruit adds chewiness and a sweet‑sour contrast that brightens each bite.
Protein Punch
Mix in a scoop of vanilla whey protein powder or a plant‑based protein isolate. This turns the bars into a post‑workout snack without compromising the original flavor.
Storing and Bringing It Back to Life
Fridge Storage
Store the bars in an airtight container at room temperature for up to a week. The airtight seal prevents moisture loss, keeping the bars chewy and fresh.
Freezer Friendly
For longer storage, wrap each bar individually in plastic wrap and place them in a freezer bag. They’ll stay fresh for up to three months. Thaw at room temperature for 15 minutes before serving.
Best Reheating Method
Add a tiny splash of water before reheating to create steam, which restores the bars’ moist interior. Warm them in the microwave for 15–20 seconds or in a toaster oven at 300°F for 5 minutes.